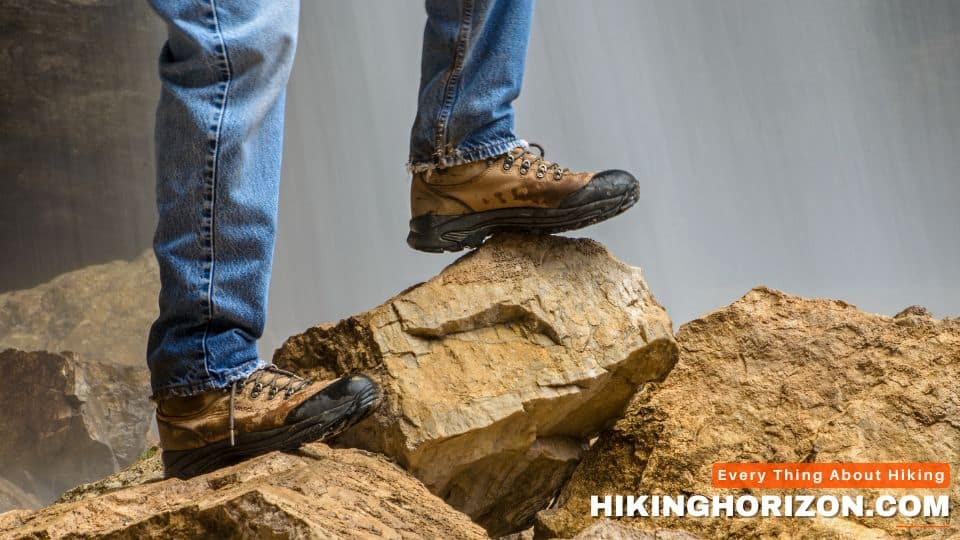
Properly fitting hiking boots should provide a snug feel around your heel and the sides of your foot, ensuring about an inch of space for your toes. It’s best to assess your hiking boot size towards the end of the day, considering potential swelling, and wear your thickest socks during the fitting process. If you’re uncertain about your boot size, you can measure your foot at a shoe store to ensure an accurate fit.
Before lacing up and hitting the trails, finding properly fitting hiking boots is one of the most important investments you can make. According to the American Podiatric Medical Association, ill-fitting hiking boots account for a majority of foot injuries and pain in outdoor enthusiasts. This can cut adventures short and turn a peaceful hike into a miserable slog.
So how do you determine what “proper fitting” really means when it comes to hiking footwear? How Should Hiking Boots Fit? While expert outfitters can assess your feet and make personalized recommendations, there are some key fitting factors anyone can evaluate at home. In this blog, we will cover:
- How to find the right boot length and width
- Ideal toe room and arch support for hiking
- Proper heel slippage and locking in the ankle
- Breaking in boots and adjusting fit over time
- Special considerations for wide or narrow feet
Follow these professional fitting tips, and you’ll be well on your way to happy, healthy hikes for miles to come. The trail awaits!
Table of Contents
How Should Hiking Boots Fit? 3 Methods To Fit New Hiking Shoe
For a well-fitting pair of hiking boots, it’s recommended to visit a specialized hiking shop where a professional fitting service is available. This way, an experienced footwear expert can assist you in determining your correct size and curate a selection of options that are likely to match your foot shape and suit the nature of your hikes. In case accessing such services isn’t feasible at the moment, you can explore three fitting techniques that assist hikers and backpackers in discovering their ideal fits.
#1: Stand In The Insoles ─ get the right fit

This old-school trick tests overall length and width in one quick step:
- Remove the insole
- Stand on it to imprint your foot outline
- Insert back in the boot and try on
- The insole imprint and your foot should align perfectly
#2: The One-Finger Test ─ sock thickness maters

The One Finger Test is a quick and easy way to gauge if the hiking boots you’re trying on are the right length.
Here are the steps:
- First, put on the type of hiking sock you plan to wear on the trails. The thickness of the socks impacts how the boots will fit.
- Next, completely loosen the laces on the hiking boots so you can easily slide your foot all the way inside.
- Firmly plant your heel all the way back into the boot’s heel cup. Your toes should press against the front of the boots.
- With your foot flat inside the boot, see if you can slide one finger down between your heel and the back of the boot.
- There should be just enough space to insert one finger vertically behind your heel when boots are laced neutrally. Not so tight you can’t get a finger in, but not so loose two fingers easily fit.
- One finger’s width space means the boots should be adequately sized to account for the extra foot swelling that happens when hiking for hours.
- However, if your heel is lifting up significantly as you walk in neutral-laced boots, they are likely too large overall. Consider sizing down.
- On the other hand, if you can’t insert even one pinky finger behind your heel, the boots may be too short and constricting.
- Try the one-finger test on both feet to ensure the boots fit properly on your left and right feet. Each foot may need a different size.
- Walk around in the boots on different surfaces to complement the finger test. Focus on any pinching, heel lift, or toe impacts that signal fit issues.
Using the quick one-finger method along with walking tests allows you to zero in on hiking boots that check all the fit boxes before taking them out on the trail.
#3: Use a Brannock Device

While the old-school Brannock measuring device can provide a rough estimate of your general shoe size, it doesn’t directly correlate to manufacturers’ sizes of hiking boots and shoes today. The Brannock system was developed almost a century ago, and many brands have moved away from basing sizing on its measurements.
Using a Brannock device will give you three key foot dimensions – heel-to-toe length, heel-to-ball of foot length, and width across the foot. Measuring both feet’s a good idea since there can be slight differences between your left and right.
You’ll generally go up about a half size for hiking boots from your Brannock length measurement to allow toe room for downhill hiking and foot swelling on the trail.
If your heel-to-toe length varies significantly from your heel-to-ball measurement, you may need to experiment with sizing to find the right compromise in hiking boots.
Overall, look at any Brannock device measurements only as a starting point. Consider it a helpful baseline, but expect to make adjustments from there through in-person testing. There’s no substitute for actually walking in boots on simulated trail conditions to assess comfort and support.
Here you can find out all about using the Brannock device.
Follow these steps to use a Brannock device:
- Remove your shoes and socks so you are only in bare feet. This allows the most accurate foot measurements.
- Place your foot flat onto the metal foot plate with your heel slid all the way back into the heel cup.
- Make sure your foot is centred side-to-side on the device. Your heel should line up with the rear ruler.
- While keeping your foot flat and still, slide the movable indicators along the side rails until they are snugly contacting the edges of your foot at the widest point.
- Take note of the length measurement at your longest toe and the width at the ball of your foot. This is your length and width sizing.
- Next, keeping your heel in place, slide the movable indicator that sits under your arch forward until it touches your arch height. Note this arch measurement.
- Repeat steps 2-6 with your other foot. Make sure to measure both feet, as there may be slight differences.
- Provide the associate at the shoe store with your measurements so they can bring hiking boots in the proper length, width, and arch height.
- Try on recommended boots while wearing hiking socks. Walk around and simulate trail conditions to assess overall fit and comfort.
Using a Brannock device along with a walking gait analysis helps take the guesswork out of finding the ideal hiking boot sizing and fit. Both feet measured accurately set you up for the best fit.
Finding The Right Boot Length ─ boot that fit matters

The first step is getting the overall length right. Remember, leather hiking boots won’t stretch much length-wise, so getting the base size correct is crucial.
Ideally, you want around 0.5-1 inch of space between the tip of your toe and the boot’s toe cap. Going by your normal shoe size is a good starting point, but fit can vary across brands and styles.
Getting the length dialled in is the first step, but you also need to evaluate width and ensure the boots suit your foot shape.
Related Article: How Hiking Boots Should Fit?
How Wide Should Your Hiking Boots Be?

Beyond the length, it’s important hiking boots fit properly across the ball of the foot and instep. The ideal hiking boot offers a snug, comfortable width through the heel, midfoot arch area, and forefoot toe box. REI experts advise, “Boots should be gently snug across your feet without squeezing. You want room for some swelling without losing circulation.”
Your feet are likely slightly wider across the forefoot while narrower at the heel and ankle. Getting this proportion right will prevent pinching, blisters, and instability:
- The boots should feel snugly comfortable around the forefoot without squeezing the toes. You need just enough room for your feet to swell on long hikes without losing circulation.
- Pay attention to any tight spots that could become irritating pressure points later. Common problem areas include the pinky toe, instep, and around the ankles.
- Consider aftermarket toe caps if the built-in toe box is uncomfortably tight or shallow. These caps sit over the existing cap to provide more vertical space and width.
- Try different lacing techniques to adjust the instep fit. Wider lacing creates more volume, while heel lock lacing pulls the heel back and secures the ankle.
- Shop carefully if you have exceptionally wide or narrow feet. Not all brands offer multiple widths, so seek options especially designed for extra width across the forefoot or narrow heel cups.
Focus on aligning the widest part of your foot with the boot’s widest toe box area. Lace loosely over the instep to prevent pinching if needed. Look for multiple widths from brands catering to narrow or wide feet. Getting the proportions right prevents painful hot spots.
Now that you have the length and width dialled in, it’s time to evaluate the toe box for ideal room to splay and grip.
How Should Hiking Boots Fit Around Your Toes?

Proper toe box room is essential in hiking boots, allowing natural toe spread to grip terrain and prevent black toenails from jamming downward.
REI boot fitter Lily Chen recommends “A half inch to inch of space between the tip of your toe and boot end.”
Ideally, your toe should not strike the front when leaning forward. Wiggle them freely without excess space to flop around. The widest part of your foot should align with the boot’s widest point through the toe box and forefoot for stability.
Having adequate toe room and toe splay is essential in hiking boots for several reasons:
- It allows feet to grip and stabilize over uneven terrain naturally.
- Toes help control the descent on steep downhills and catch yourself if slipping.
- Adequate room prevents black toenails and hits against the front when descending.
- With proper space, toes can spread out to improve balance and stability.
So what exactly does this look like in a well-fitted hiking boot?
- You should be able to freely wiggle your toes inside the boot without jamming into the front or sides.
- With feet flat, there should be around 0.5-1 inch of space between the tip of your big toe and the inside of the toe cap.
- Your toes should not strike the front of the boot when walking downhill or leaning forward.
- The widest part of your foot should match up with the boot’s widest point through the toe box and forefoot.
To test stability and toe splay, try standing on your tip toes and then rocking back onto your heels in the boots. Your toes should have plenty of room to grip the sole and balance your weight on uneven terrain.
While the room is necessary, too much extra space can cause friction and foot slippage while hiking. Find the Goldilocks zone between a glove-like slim fit and loose flopping in the boot.
Fitting Hiking Boots Goldilocks-Style
Finding hiking boots that are perfectly fitted is a balancing act – not too tight, not too loose, but just right. Think Goldilocks are testing out different bowls of porridge to find the one that was just the right temperature.
Similarly, you want to find the boot fit that strikes that ideal middle ground:
- Boots should not pinch or constrict your feet so tightly that circulation is cut off or you feel pain points. Overly tight boots will become excruciating when feet swell during hikes.
- However, boots also should not be so loose that your feet are sliding around and flopping inside. Excessive movement leads to blisters and instability on the trail.
Instead, well-fitted hiking boots should offer a close, glove-like extension of your foot. You want no slippage but still, room for your feet to spread out and swell slightly during long hours of hiking.
Think of the fit as a narrow zone between too-tight socks and gaping and loose socks. Keep trying different lacing tightness, sizing, aftermarket insoles, and styles until you land on that hiking boot fit sweet spot.
Don’t settle for slightly uncomfortable boots, thinking you’ll just break them in. Only hike in boots that feel like a natural, comfortable extension of your own feet. Like Goldilocks, be picky until you find a ” just right boot fit!”
Related Article: How Much Toe Room Should Hiking Boots Have? A Comprehensive Guide
Dialing In Arch Support ─ must consider when buying best hiking boots

In addition to toe box room, proper arch support is vital for hiking boot comfort. High-quality boots will mould to your arches and provide stability through the midsole:
- The boot should cradle your arch without squeezing or uncomfortable pressure points.
- You want enough volume to account for swelling but avoid flattening your arches.
- The included insole or footbed matters. Swapping to an aftermarket insole can improve arch support if the stock footbed is inadequate.
- Any tightness or rubbing under the arch will quickly escalate into a painful hotspot. This area needs a comfortable, snug fit.
- The way a boot is laced can enhance arch stability. Using the first few lower eyelets to secure the heel and midfoot helps lock this area in place.
If you have particularly high or low arches, look for boots with innovative arch support built into the midsole design. This customizes stability and comfort under the feet. Getting the arch fit dialled in is crucial for supporting the foot bones and structures that absorb shock.
Next, we must ensure the heel and ankle fit properly before hitting the trail.
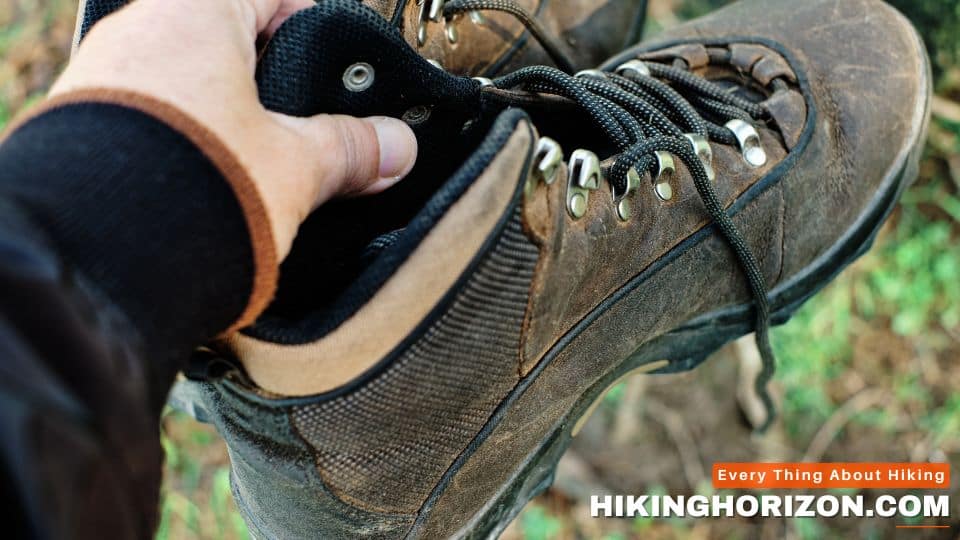
How Hiking Boots Should Fit At The Heel Cup ─ Seek Fit Properly

Controlling heel slippage when breaking in boots is key. New hiking boots can feel slick and stiff around the heel collar, causing your heel to lift as you walk. It will lead to blisters and instability.
Backpacker Magazine recommends, “Expect some heel slippage while breaking in new boots. But if heels are lifting over 1/4 inch with each step, boots may be too large.” Use lacing techniques like the heel lock to minimize lift.
There are a few things you can evaluate regarding heel fit:
- Expect some initial slippage until the leather boots mould to your heel shape. But the boots may be too big if your heel is lifting more than 1⁄4 inch with each step.
- The heel collar lining should hug your heel and Achilles area without biting, rubbing, or pinching. No exposed gaps.
- Lacing techniques like the heel lock (wrapping the laces under and through the hooks) can minimize lift by securing the heel in place.
- Aftermarket heel inserts or pads also help lock the heel in and reduce slippage until the boots fully break in.
- The included insole matters. Swapping to an aftermarket insole with better heel grip and arch support can fix issues.
Getting a secure heel setup is what converts sloppy slippage into the ideal snug “heel lock” inside a properly fitting boot. Let’s move up the ankle next.
How should hiking boots fit around the ankle?

Unlike typical footwear, hiking boots are designed to support and stabilize the ankles against lateral rolls and injury out on the trail.
Look for boots with adequate ankle height and structured ankle support based on your needs:
- Low-cut hiking shoes end just above the ankle bone for freedom of motion. They work well for shorter day hikes without heavy packs.
- Mid-height boots wrap around and above the ankle bone, providing medial/lateral support and stability. All-around versatile option.
- Tall backpacking boots sit 6 inches or higher above the ankle for maximum rollover protection and support when carrying heavy packs. Overkill for simple day hikes.
The lacing system matters since this determines how the ankles are hugged:
- Traditional hook lacing allows you to leverage different techniques to customize ankle support and heel lock. More versatile.
- Quick-pull lacing systems make getting in and out of boots easy but offer less flexibility to tweak support.
- Wraparound ankle cuffs with integrated belts or boa lacing hug and stabilize ankles without pressure points.
Pay attention to any pinching around the Achilles tendon or odd pressure points across the ankle bones when trying on boots. The fit here should be secure but not constricting.
Getting the perfect straight-out-of-the-box hiking boot fit can be tricky. Expect to rely on breaking in to really customize your ideal fit.
Related Article: How Much Ankle Support Do You Need in a Hiking Boot?
Breaking In Your Boots Before Try on Hiking trail
The break-in period is when stiff, unforgiving new boots finally start feeling like a custom extension of your foot. While you want snug boots for hiking, the materials will loosen and mould around your feet over the first several hikes.
Here are some tips for breaking in boots to get the perfect moulded fit:
- Wear them around the house to soften and flex the materials – don’t just break them in on the trail.
- Use a boot stretcher if tight spots need extra stretching in width or length.
- Spot treat any pressure points with moleskin, gel pads, or sanding rough edges.
- Use aftermarket insoles to add needed arch or heel support that customizes fit.
- Re-lace periodically as the boots ease up to keep things snug and aligned.
The break-in time is different for everyone, depending on foot shape, gait, and build. Be patient and keep adjusting until the boots feel like a natural extension of your foot.
As your feet swell and boots pack out on hikes, you must adjust again. Here’s how to tweak fit for the long haul:
Adjusting The Fit Long Term
Once broken in, you need to maintain that ideal custom fit as boots soften and feet change:
- Monitor wear indicators like creasing toe caps, collapsing ankle cuffs, or toe bumps to identify needed adjustments.
- Use tongue pads, heel pads, or insoles to take up any new excess space and prevent slippage.
- Re-lace periodically with heel lock or custom techniques to improve stability and ankle support as materials soften.
- Don’t ignore foot swelling on longer hikes. Loosen laces or strap-on gaiters to allow room expansion.
- Consider maintenance, like sealing areas that absorb moisture or re-waterproofing materials as needed.
Dialling in the right hiking boots is all about starting with the closest fit possible and then customizing it to your feet. Finding footwear with modulation and adjustment potential will allow you to maintain an excellent fit as miles pile on.
Related Article: Do New Hiking Boots Need Breaking In If They Aren’t Stiff?
Consider Feet Issues when buying hiking boots

Finding well-fitting hiking boots can be challenging for those with wider feet, bunions, or other unusual foot issues like flat arches or high arches. Here are some special tips for getting the best fit if you have:
Wide Feet
- Seek out boot brands that offer multiple width options. Order “wide” or “extra wide” versions.
- Size up in regular-width boots to allow more toe splay room.
- Look into boots with toe caps that sit over the existing cap adding width.
- Use inserts to take up excess length if sizing up. Arch supports also add structure.
- Lace loosely and toggle hooks at pressure points across the instep.
Narrow Feet
- Look for narrow or women’s specific boots with heel cups and a curved instep that pulls the heel back.
- Avoid bulky insulation or cushioning that takes up volume.
- Use tongue pads or foam inserts to improve fit if the heel is slipping.
- Consider waterproofing sprays rather than bulky liners to reduce space.
- Use laces to create a firmer heel lock and prevent forward slip.
Bunions
- Seek boots with wide toe boxes, rounded toe caps, and ample wiggle room.
- Size up and use orthotics, pads, or inserts to prevent pressure on the bunion.
- Spot treat problem areas with gel pads, moleskin, or extra foam around the bunion.
- Remove factory insoles and replace them with better aftermarket inserts.
- Opt for soft leather boots with less break-in pain.
Flat Feet
- Prioritize boots with rigid stability through the arch rather than flexibility.
- Look for cushioned midsoles with structured medial support and anti-pronation.
- Swap out flat insoles for better arch support and custom orthotics.
- Pad around the arch to fill the volume and achieve a cradled fit.
- Start with mid-height ankle support rather than low-cut shoes.
High Arches
- Avoid boots with thin, flat insoles. Seek cushioning and shock absorption.
- If the arch feels unstable, size down for a tighter instep fit or use arch braces.
- Aftermarket orthotics are crucial for adding needed arch support inside the boots.
- Focus on flexible forefoot room while locking down the heel and midfoot.
- Spot treat any pressure points along the instep with moleskin or gel pads.
By considering these solutions, those with wider, more narrow, or problematic feet can find hiking boots that check all the fit, function and comfort boxes. Avid hikers know the hunt for the perfect fitting and supportive boot is well worth the effort once you’ve found “the one”!
Related Articles:
Try the boots by Best Brands For Specific Fits

Here are some of the top hiking boot brands suited for specific foot shapes and issues:
Best Hiking Boot Brands For:
Wide Feet
- Altra
- Asolo
- Salomon
- Oboz
- Vasque
- Keen
Altra’s foot-shaped toe box provides a wide platform for toe splay. Salomon builds roominess into the forefoot without bulk. Oboz adds stability technologies for overpronators.
Narrow Feet
- Lowa
- La Sportiva
- Vasque
- Scarpa
- Salomon
Lowa uses narrow heel cups and a curved instep to secure narrow feet. La Sportiva crafts precision fits for performance hiking. Scarpa builds around narrower foot volumes.
High Arches
- Asolo
- Lowa
- Scarpa
- Salomon
- Vasque
Asolo uses molded arch-supporting midsoles. Scarpa and Lowa incorporate stabilization plates to support high arches. Salomon’s integrated lacing systems boost midfoot support.
Flat Feet
- Oboz
- Salomon
- Keen
- Merrell
- Hoka
Oboz adds multi-density midsoles and structured arch support. Hoka maximizes stability and shock absorption for overpronators. Salomon’s Sensifit wraps and cradles flat feet.
Bunions/Corns
- Altra
- Brooks
- New Balance
- Oboz
- Keen
Altra and Oboz emphasize wide-toe boxes. Brooks crafts adjustability features to minimize pressure. New Balance and Keen design ample, rounded toe areas to reduce irritation.
Researching to identify brands suited for your foot shape can simplify the fitting process and reduce discomfort on the trails!
6 Tips for Fitting Hiking Boots
Achieving hiking boot nirvana involves balancing proper length, toe box width, arch support, and heel lock. Here are key expert tips for finessing fit:
1. Consider The Shape Of Your Feet
Do you have particularly high arches or wider forefeet? Outdoor Gear Lab advises, “Match boots to your foot’s shape. Seek out brands catering to narrow or wide sizes.” Modifications like aftermarket insoles can further customize the fit.
2. Lacing Properly
Don’t just loosely lace and go! “Use lacing techniques to improve heel and arch support like the heel lock wrap,” says hiker Rachel Miller. It pulls the heel back, minimizing lift. Proper lacing enhances stability from the ground up.
3. Customize Insoles
Swap flimsy generic insoles for aftermarket insoles moulding to your feet. “Custom orthotics provide structure and support if the stock footbed is inadequate,” foot doctor Amina Diab explains. Addressing fit from the inside out is powerful.
4. Wisely select Socks
The thickness and material of hiking socks impact volume fit. “Wear the actual socks you’ll hike in when trying on boots to assess fit,” recommends athlete Rebecca Richardson. Synthetic, wool or blended socks hold less moisture.
5. Test on a Short Hike
Before committing to boots, test them on an easy trail. This lets you evaluate “rubbing, slippage, and pressure points when feet swell during real hiking conditions,” says Brian Thompson of Sky-Liners mountaineering club. Mimic the motions and terrain of hiking to reveal problem spots.
6. Break-In Period
Even if boots feel great out of the box, expect a “break-in period” as materials mould to your feet, advises outdoor shop clerk Lara Betz. Spot treat tight spots proactively. The fit will evolve over early hikes before becoming perfectly customized.
By tuning in to your own feet while applying key expert tips, you can find ideal hiking boot fits tailored to your needs and comfortable over the miles.
Pro Tips for selecting a proper boot size

Here are some pro tips from Mark England, owner of hiking specialty store Mountain Trail Outfitters, for finding comfortable, well-fitting hiking boots:
- Shop late in the day when feet are naturally more swollen to mimic trail conditions
- Try boots on with the socks you’ll actually hike in to factor in the thickness
- Walk on inclined surfaces to check the room when leaning forward
- Expect a break-in period as stiff boots mould to your feet
- Snug hiking boots properly support without cutting off circulation
- Heels shouldn’t slip more than 1/4 inch when new before moulding to your feet
- Toe room allows natural gripping motion but avoids loose sloppiness
- Align the boot’s flex point with your foot’s natural bend zones
Taking the time to understand your feet’s quirks and expert fitting advice leads to hiking boot bliss!
Wear your hiking boots in the same way you intend to use them
Don’t just casually slip on hiking boots to determine fit. To replicate trail conditions, outdoor gear store Mountains Plus recommends trying boots on “While wearing the type of socks you’ll hike in. Tie up the laces and walk around the store, up and down inclines and over uneven surfaces.”
It mimics hiking motions and shows where boots may rub or pinch when feet swell. Leaning forward tests toe room while zig-zagging checks ankle support. Try boots on both feet to detect any fit differences. Taking the time to simulate hiking in boots leads to making better sizing and style selections.
Consider the Socks
Choosing the right hiking socks is important to get a proper fit with your boots. Here are some tips on how your socks impact boot fitting:
- Try boots on with the actual socks you’ll wear hiking. Thickness impacts fit.
- Thicker cushioned socks take up more volume, so you may need to size up in boots to allow the room.
- Tight boots may fit better with thin, moisture-wicking liner socks rather than thick heavy socks.
- Wearing two layers, like a thin liner sock underneath heavier wool hiking socks, reduces friction.
- The material matters – wool or synthetic hiking socks control moisture better than all-cotton.
- Wearing two pairs of socks can lock heels in better if heels are slipping into boots.
- Bring extra pairs of socks on hikes as sweat-soaked socks compress and impact fit.
- Well-fitted boots reduce pressure points that lead to blisters from sock friction.
- Toe seams on socks should align with toe caps on boots to prevent irritation.
Considering your hiking socks’ thickness, cushioning, and materials ensures your boots maintain ideal comfort and support over the miles. Test boots with the socks you’ll actually wear.
Match the Boot’s Flex to the Terrain
When choosing hiking boots, it’s important to match the boot’s flexibility to the type of terrain you’ll be hiking on. Here are some tips:
- Very flexible boots with minimal stabilization features are best suited for relatively flat, smooth day hikes. The flex allows natural foot motion.
- For moderately rocky trails, look for boots with a semi-stiff midsole to provide stability while still allowing some ankle flex. Light backpacking boots are a good option.
- Rugged backpacking boots with stiff midsoles and shanks are necessary for multi-day trips with heavy packs or very steep, uneven terrain. The rigid sole stabilizes each step.
- Evaluating the boot’s midsole material can indicate flex – EVA foam is flexible, while TPU or polyurethane midsoles reduce torsion.
- The external heel and toe counters should also match conditions – soft for highly flexible boots and rigid for the stiffest support.
- Trying on boots, walking, bending your knees and ankles through a full range of motion. Make sure the boot’s flex aligns.
- Press down on the toe to check stiffness. Hard to bend equals very stiff boots suited for uneven, rugged hikes.
Matching your boots’ flex and stability features to the expected trail and hike conditions will maximize comfort while preventing injury. Let your route guide the right balance of flex versus support.
One size bigger or lace adjustment - which suits the best fit
Getting the right size is crucial when buying a new pair of hiking boots. Some people size up and get a boot that’s a half or full size bigger, thinking it will allow more wiggle room. However, too-large boots can cause slipping, heel lifts, and blisters while hiking. The key is to find a pair that fits your feet snugly without being painfully tight.
When trying on boots, ensure your toes don’t touch the end of the boot. You want just a bit of wiggle room to slide a finger between your heel and the back. Try lacing techniques before sizing up if a new pair of boots doesn’t fit perfectly. For boots that are too tight, focus on loosening the laces across the top of your foot and ankle while keeping them snug at the bottom. It allows your foot to slide in more without your heel lifting.
You can also try thicker sock liners to take up volume if your feet are a little loose. Walk around the store and up and down inclines before deciding if you need a larger size. Proper lacing and break-in time often fix small fit issues with new hiking boots.
Sizing up too much backfires once the boots are broken in. The materials will mold to your feet, reducing volume and flex. Boots that initially feel “just right” may end up with too much room for your toes after miles on the trail. Evaluate the fit standing, walking, and going uphill/downhill before deciding. Try on multiple sizes and lace them properly when testing. Your feet swell on long hikes, so you want snug hiking boots. As long as your toes don’t hit the front and you don’t have pain, a snug boot with the right lacing will often become the perfect fit after the break-in.
FAQs about getting the right hiking boot fit
How much room should you have in a hiking boot?
You should have about a thumb’s width of space between your toes and the front of the boot. This allows enough room for your feet to swell and your toes to grip terrain without slamming into the front when going downhill.
Should I go up a size in hiking boots?
It depends. If you’ll be wearing thick hiking socks, need to accommodate orthotics, or have wide feet, sizing up may provide needed toe room and volume. But choose aftermarket insoles and sizing adjustments before sizing up just for comfort.
How do I know if my hiking boots are too small?
Signs boots are too small include toes jamming into the front painfully, numbness or lost circulation, heels lifting excessively as you walk, and uncomfortable pinching at the toes, instep or heels. You should have wiggle room for toes.
How do I know if my hiking boots are too big?
Excess heel slippage and tightening laces to prevent foot sliding are signs that boots may be too large. Your feet shouldn’t be flopping around loose inside boots. Dial-in fit with different lacing techniques, orthotics and sizing down.
How snug do you want hiking boots?
Boots should be gently snug across your feet without squeezing toes, instep or heels. Focus on a heel locked in with no lift, toes free to wiggle and proper foothold support. Loosely snug is ideal.
Should hiking boots be the same size as sneakers?
Not always. Try boots on while wearing hiking socks to assess fit. The rigid structure of boots and intended terrain may mean you need more toe room than sneakers or a narrower heel fit.
Is it better to buy bigger or smaller boots?
If between sizes, go smaller for a precise foothold. Use orthotics and aftermarket insoles to make up needed volume instead of getting boots too large. Locked stability prevents injury on the trail.
How much heel slip is normal in new boots?
Expect some initial heel slippage until boots form to your feet. But if heels lift over 1/4 inch with each step in new boots, the size may be too large. Look for a secure heel wrap with minimal lift.
Should your heel lift in hiking boots?
A small amount of heel lift when new is normal as boots break in. But excessive lift indicates poor fit. Use heel lock lacing, heel inserts and sizing down to achieve a snug heel with no major lifting as you walk.
How do you know if the boots fit right?
Boots fit right if your heel feels locked in place with minimal lift, your toes can wiggle freely without hitting the front, your instep feels secure but not pinched, and your foot has room to swell slightly after hours of hiking.
Conclusion
The trail is calling, but don’t take another step without boots that help every footfall feel like walking on clouds! Now that you’ve become a boot fitting expert armed with more wisdom than a seasoned cobbler march forth and find your sole’s perfect match. Whether you have picky paws or are blessed with average feet, embrace the quest for hiking boot nirvana. Blisters and black toes will be banished as you traverse mountain paths unhindered by ill-fitted footwear woes.
Let your next nature adventure bring the joy of cruising through forests and up mountainsides, not hobbling along cursing your poor boots. You now hold the keys to unlocking comfortable miles. Here’s to happily trekking off into the sunset, toes wiggling freely, heels on lockdown, ready to seize that peak view – one perfectly fitted step at a time!

MARK RODRIGUEZ
Mark is an experienced backpacker who has completed several multi-day hikes, including the John Muir and Wonderland Trail. He is also a hobbyist photographer who delights in capturing the captivating essence of nature through his camera lens. Mark is passionate about environmental conservation and often volunteers for trail maintenance and clean-up projects.


What an informative article on finding the perfect fitting hiking boots! As an avid hiker who has struggled with poorly fitted boots leading to blisters and pain, I appreciate all the helpful tips you’ve provided here. I’m guilty of ordering boots online without trying them on and have definitely learned my lesson – your advice to visit a store in person and test out multiple brands and sizes is so important. Measuring my feet properly and understanding features like heel lock will be game-changers for finding boots that are truly comfortable mile after mile on the trail.
Thank you for also including great suggestions for breaking boots in gradually to mold them to your feet. My toes will be thanking you on my next hike now that I know to look for thumbs-width of space in the toe box! I really value gear advice from experienced hikers, so I’ll be sure to keep referring back to this article as I shop for my next pair of hiking boots.
Thanks for sharing your wisdom to help others find hiking footwear that enhances their adventures rather than hurts their feet. Happy trails!
Awesome! Its genuinely remarkable post, I have got much clear idea regarding from this post