Can hiking boots be stretched to cradle your feet in custom comfort? The answer is yes – but only to a degree.
It depends on the type of leather and construction, but quality full-grain all-leather boots can stretch up to a full size from new to fully broken in. Here are the average stretch ranges:
- Full-grain leather boots – Up to 1 full-size
- Split-grain leather boots – 1/2 to 3/4 size
- Suede or nubuck leather – 1/4 to 1/2 size
- Synthetic leather/mesh boots – 1/4 size maximum
This definitive guide will take you on a journey to boot nirvana, revealing insider tips to banish tightness and unlock a perfectly contoured fit. We’ll unpack why proper fit matters in the first place to prevent blisters and pain. You’ll discover how much stretch various materials yield, from supple leathers to unforgiving synthetics.
Whether you’re seeking a quick trailside fix or aiming to postpone a pricey upgrade, you’ll learn how to tailor your boots’ shape for hiking heaven. We’ve got you covered, from leveraging the hidden powers of ice and heat to enlisting professional cobblers in your quest.
Follow along as we transform boot break-in from a blister-ridden chore into a strategic endeavor. Let’s master the art of stretch and spring past “close enough” toward precision fit perfection! Your dream hiking experience starts here.
Table of Contents
Why Proper Fit Matters for Hiking Boots

Before jumping into how to stretch hiking boots, it helps to understand why fit is so critical for hiking footwear.
When you’re trekking miles on the trail with a heavy pack, your boots must offer stability and prevent injury. Hiking boots are designed to give ankle support and keep your foot secure over rugged terrain.
As thru-hiker Lily Born told us, “If your boots don’t fit right, you’re going to have hot spots and blisters that make every step miserable. I’ve seen people sidelined from poorly fitted boots on the first day out.”
Painfully tight boots can cause blisters, hot spots, and loss of circulation in your feet. Veteran hiker Tyler Merson warns, “Numbness or tingling in your toes is a bad sign. Boots too small restrict blood flow, which you’ll pay for later.”
On the opposite end, loose boots lead to slippage and friction that rubs your feet raw. “Sloppy fitting boots had my heels shredded and bleeding after a 8 mile hike,” says Claire Chu, avid day hiker. “Now I triple check for good heel lock.”
In a 2017 survey, 79% of hikers reported issues with poorly-fitted boots leading to discomfort or injury.
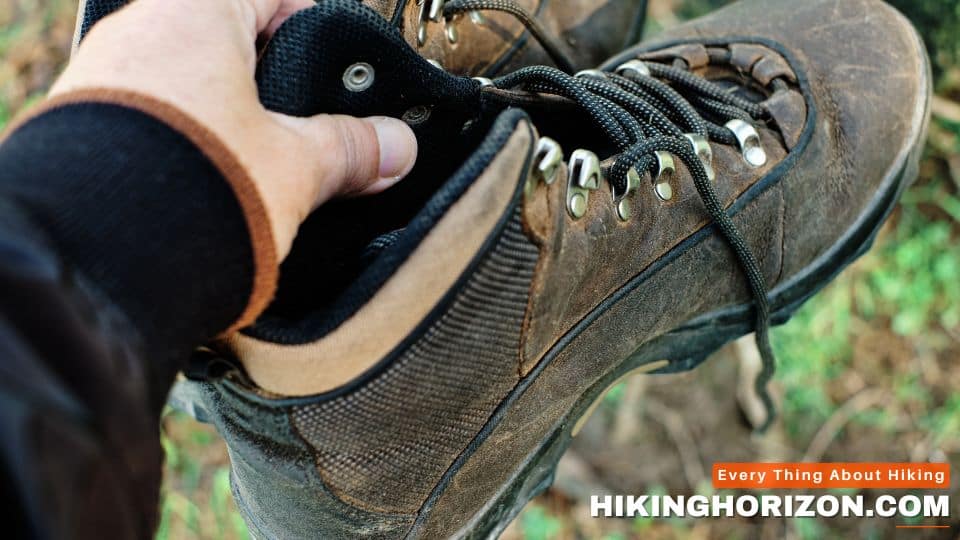
The ideal fit is snug at first, with about a thumbs width between your toes and the front of the boot. Leather boots will mold to your feet over time, while synthetic boots have less give.
Don’t rely on thick hiking socks to make boots fit. You want your bare foot to fit the boot properly first for the best comfort and support, per footwear expert Rachel Cox.
Related article:
Do toe box of Hiking Boots Stretch To Fit Your Feet?

Quality hiking boots are designed to gradually mold closer to the unique shape of your feet over time and miles on the trail. It provides an increasingly personalized, comfortable fit.
As with any footwear, extended wear allows leather and synthetic hiking boots to expand slightly, creating a well-worn feel. The materials and construction make them pliable enough to conform to your foot’s dimensions.
Daily use also naturally stretches boots as your feet swell and elongate from being upright all day. The constant friction and flexing motion soften the leather or mesh, expanding it incrementally.
However, while some break-in is expected with hiking boots, you still want the best initial snug fit possible before hitting the trail.
Boots that are radically loose or tight to start put you at risk of blisters and foot fatigue that can cut adventures short. Ensure heels are gripped securely, and toes have wiggle room when fitted.
Then let boots gradually customize to your feet over initial hikes. Target any remaining pinch points with stretch techniques. But listen for persistent pain-signaling sizing issues.
Remember to replace boots once the tread wears thin or they lose stability. Don’t try to prolong ill-fitting pairs. Broken-in boots mold to support you best over rugged terrain. Prioritize fit and function when selecting lasting hiking footwear.
Do the toe box of your Hiking Boots Stretch ─ Factors That Determine

Not all hiking boots are made the same, and some styles will stretch more readily than others. Here are key factors that play into how much “give” your boots may have:
Leather Type
The leather used to make hiking boots comes in varying grades and thicknesses.
- Full-grain leather is the highest quality – it’s durable, water-resistant, and ages well. It will eventually stretch the most.
- Split-grain leather is sanded or buffed on the underside, making it less prone to stretching.
- Lower-grade nubuck or suede leathers have more limited stretch.
Premium full-grain hiking boots can stretch a full size, while lower quality leather may only give 1/4 to 1/2 size, says master boot fitter Lou Roth.
Construction
How the boots are put together also determines stretch ability:
- All-leather hiking boots have the most give, as natural leather forms to your feet.
- Boots with heavily stitched overlays have less room to expand.
- Waterproof linings like GoreTex add structure so boots stretch less.
- Molded or bonded construction leaves the least room for breaking in.
With stitching or bonding, focus stretch efforts on the leather upper above the overlays, advises Roth.
Fit Style
Boots come in narrow, regular, wide, and extra wide fits.
A wide boot has more room to conform to your foot’s dimensions. Tighter narrow/regular fit boots will resist stretching more, explains Roth.
Consider sizing up in width first before length, if possible, for the right snug fit.
How Much Can My Hiking Boots Stretch?

On average, expect your hiking boots to expand between 1/4 and 1 full size from when they are brand new to being fully broken in.
Stretching beyond a full size starts to compromise the boot’s stability and structure, says Roth.
Here are general guidelines on a stretch range based on material:
- Full-grain leather hiking boots: Up to 1 full size
- Split-grain or suede leather: 1/4 to 1/2 size
- Synthetic leather or mesh: 1/4 size max
- Molded/bonded boots: Minimal stretch (order wide sizes)
Of course, this can vary based on individual boots and your feet. Always choose performance and comfort over-relying on heavy stretch, suggests Born.
While there are tips to stretch hiking boots at home, the easiest way to ensure an ideal fit is to try boots on at the end of the day when your feet are the largest.
Why You May Need to Stretch Your Hiking Boots

Even if you are sized correctly, there are a few reasons you may need to stretch or break in hiking boots further:
- Your feet are different sizes. Almost everyone’s feet differ slightly in size. Fitting to your larger foot can leave the other tight. Stretching the small side boot allows for a better fit.
- Your feet grow bigger with age. Feet spread out naturally as you get older. If hiking boots felt perfect 5 years ago, you may need to stretch new pairs more to accommodate mature feet.
- Weight gain slightly increases foot size. As you gain weight, your feet flatten out and expand. Old boots can start to feel too narrow.
- Pregnancy also enlarges feet. Many women go up 1/2 to a full size during pregnancy from hormones loosening ligaments. Old boots will likely need stretching to be comfortable again.
No matter the cause, easy DIY stretching techniques can help fine-tune the fit of your current boots before sizing up.
12 Effective Methods to Stretch the Toe Box of Hiking Boots
The toe box is the most common area of hiking boots that needs stretching for a comfortable fit. Once you have decided to stretch your beloved hiking boots, here are 12 effective ways to expand a snug toe box. Let us explore every method with a step-by-step guide on how you do it at home.

#1 Wear Them Around The House ─ Break in your boots

The most obvious (and time-consuming) way to stretch tight hiking boots is by putting in miles and wearing them around the house and neighborhood. The friction and flexing motion mold the leather.
“I wore new stiff hiking boots while cooking dinner or watching TV to get them forming to my feet,” says Chu. “It really helps speed up the process.”
How to do it:
- Wear boots for short walks of 15-20 minutes daily to gradually mold the leather to your feet.
- Really bend your feet and toes often while wearing to flex the upper material.
- Target extra tight spots by lacing looser over those problem areas. Focus pressure on already stretched zones.
- Thick hiking socks take up internal volume, so try wearing them with your boot stretching.
- After each wear, use shoe trees or crumpled paper to help boots hold their expanded shape.
With consistent wear, boots will custom form to your feet through friction, heat, and motion flexing. But be wary of hot spots rubbing in problem zones that signal poor fit.
#2 Freezing Water Method to stretch hiking boots

The freezing water method is a handy hack to stretch leather hiking boots without causing damage. It takes advantage of the expansion properties of water as it freezes to apply gentle outward pressure.
“I use frozen water bottles to stretch boots without over-stressing them,” explains Roth. It is gentler than wearing it initially.
How It Works
When water transitions from liquid to solid ice, its volume expands by up to 9%. This swelling effect slowly pushes apart the walls of whatever container it is in.
You can harness this to stretch your boots by filling water bladders, bags, or bottles and freezing them. The ice acts like a natural shoe stretcher, forming inside the boots’ toe box and other tight areas.
It provides controlled strain just where you need it most to open up the fit. The ice mold’s shape custom fits your boot profile.
Step-By-Step Guide
Follow these steps to stretch your hiking boots with frozen water safely:
Prep the Boots
- Use leather boots only – synthetic materials may crack.
- Remove the insoles, if possible, to maximize interior space.
- Apply a protector spray or conditioner inside to prevent water damage.
- Target the tight spots by loosening laces over those areas.
Fill Bags & Freeze
- Fill zip-top bags, bottles, or bladders with water, removing all air. Seal tightly.
- Squeeze the bags to conform to the shape of the toe box before freezing solid. Ice takes the shape of containers as it expands.
- Lay them flat in your freezer overnight so the water freezes evenly.
Insert in Boots
- In the morning, immediately place the frozen molds inside your boots where they are the tightest.
- If needed, gently flex the frozen bags as you insert them to fit the toes and sides.
- Leave the ice inside until fully melted – the slow thaw prolongs the stretching duration.
Walk Around
- After the ice melts, drain the excess water and put on dry medium-thickness socks.
- Tightly lace up the boots. The materials will be more pliable from the cold exposure.
- Walk around on flat ground to further mold and flex the leather to your feet before it stiffens again.
Repeat Daily
- Freeze new molds and use them to continue stretching for 10-15 minutes daily.
- Apply leather conditioner each time to keep the material supple.
- Combine with wearing the boots after to reinforce shape.
Consistent use allows the freezing water method to safely provide a 1/2 to full-size stretch relief, especially in the toe box. Just take care not to overdo it and compromise durability. Let your feet guide you to the perfect fit.
#3 Wear thick socks For Stretching new Boots

Slipping on padded hiking socks is an easy way to help stretch and widen tight leather boots over time. The extra sock volume takes up internal space, exerting outward pressure on the leather.
Famous long-distance hiker Andrew Skurka advises, “Wearing thick socks while breaking in boots speeds the stretch process by creating friction inside, and protects your feet.”
how to stretch out hiking boots
Follow these steps to safely stretch your boot’s toe box and problem zones with sock help:
Select Maximum Cushion Socks
- Choose the thickest hiking socks you’ll wear on the trail for the best stretching efficiency.
- Look for socks with dense cushioning bands across the toes, heels, and arches for maximum volume.
- Materials like merino wool or synthetic wicking fibers add extra bulk without overheating.
- Ensure socks don’t compress toes when worn alone before sizing boots.
Wear Socks Around the House
- Put on the thick sock pair and lightly lace up your boots. The fit will feel extra snug.
- Walk around inside for 20-30 minutes to let the sock padding press outward on tight spots with each step.
- Really flex your feet and ankles often while moving to help mold the leather.
- Target the toe box by scrunching toes upward and downward repeatedly while wearing.
Rest Boots With Socks On
- When not wearing, stuff socks into the toe box and problem areas before storing boots.
- You want the socks to remain lightly expanding the leather while at rest.
- Change to fresh, clean sock pairs daily so oils don’t accumulate.
Combine With Other Methods
- Simultaneously use leather conditioner and shoe trees to help boots retain shape between wears.
- Try on boots when feet are most swollen at the end of the day for an expanded fit baseline.
Merson recommends, “Wear the thickest socks you’ll hike in when breaking in boots and your feet will have room when wearing thinner pairs.”
With consistent stretch sock use, boots can safely mold up to a half size wider for custom-tailored comfort. Listen to your feet, and don’t overdo it!
#4 Use a Shoe Tree

Shoe trees are an affordable DIY tool to help gently stretch and widen tight leather hiking boots over time. Shoe trees apply steady outward pressure from inside the boots to incrementally expand the shape.
Renowned long-distance hiker Andrew Skurka recommends, “Keep boot shoe trees inserted when not wearing to maintain the stretched shape instead of shrinking back.”
Follow these steps to use shoe trees for stretching boots properly:
Select Adjustable Tree Type
- Look for wooden shoe trees with adjustable metal turnbuckles built into the toe box and sides.
- It allows you to control and increment the outward stretching pressure.
- Boot trees fit inside the ankle, while regular trees just do the footbed.
- Make sure trees are slightly wider than the boot interior to have a stretching effect.
Apply Leather Conditioner
- Rub thoroughly moisturized oils, wax, or leather cream into the boot lining before inserting trees.
- Soften leather first, so it more readily accepts shaping without cracking.
- Pay extra attention to any current extra snug spots.
Insert Trees Snugly
- After conditioning, firmly insert trees into boots as far as they will go.
- Twist turnbuckles periodically to ratchet trees wider. Only goes up 1/4 turn every few days.
- Keep trees in 24/7 between wears for maximum expansion time.
Wear Boots Normally
- Remove trees and wear boots as normal with thin socks to reinforce the new fit.
- Walk around before and after hikes to mold softened leather further.
- Use trees to maintain size, not necessarily gain more stretch.
With patience, shoe trees can gain 1/4 to 1/2 size of stretch while protecting the boot structure. Let your feet guide adjustment rather than cranking expanders open quickly.
#5 Use Different types of Shoe Stretchers

Shoe stretchers are mechanical devices that apply calibrated outward pressure inside boots to expand and widen specific tight spots.
Different Types of hiking boot stretchers
- Mechanical stretcher – Uses calibrated knobs or turnbuckles to incrementally expand the toe box, sides, instep, and shaft separately. Made of wood or plastic.
- Inflatable stretcher – An air bladder is pumped up to apply pressure along the entire lining gently. Volume is adjustable.
- Bunion and joint stretcher – A metal rod with ball ends of various sizes to target tight toe joints. Cobblers use these.
- Boot jack stretcher – A heavy-duty option with curved wooden arms that wedge apart the sole and upper for full boot stretch.
Turnbuckle-style mechanical stretchers allow the most customization. Inflate bladders provide even overall pressure. Cobbler joint tools focus on small tight spots.
Renowned hiker Ed Viesturs says, “Having my local gear shop professionally stretch my boots with a stretcher saved me from a lot of painful blisters.”
Follow these steps to stretch your boots at home with a stretcher safely:
Purchase an Adjustable hiking boot stretcher
- Look for a stretcher with turnbuckles or knobs to control stretch intensity incrementally.
- Opt for one that independently targets toes, sides, instep, and ankles.
- Wood-and-metal styles allow the most customization. Inflatable models apply overall pressure.
- Pro models can gain over a full size but are pricier.
Soften the Leather First
- Rub moisturizing oils or wax thoroughly into the boot lining before stretching to prevent cracking.
- Focus on lubricating extra snug zones to prep the material.
- For quicker penetration, apply rubbing alcohol using a cloth, then let dry for 5 minutes.
Insert the Stretcher
- Firmly insert the stretcher fully into the boot, heel to toe.
- Slowly turn to expand knobs; only 1/4 turn every few days for gradual acclimation.
- Target the toe box first, then the instep and sides if needed.
- Never over-crank to avoid damaging the boot. Err on the side of under-stretching.
Wear Boots Normally
- Remove the stretcher and wear boots as usual with medium socks to set the shape.
- Walk flexing feet before and after use to reinforce the molding.
- Only use a stretcher to maintain size once broken in, not gain more.
With light-controlled use, an adjustable stretcher can safely gain up to 1/2 size extra room without compromising durability. But don’t rush the process.
#6 Use Newspaper or Sock Balls

Tightly wadding newspaper pages or spare socks into balls and placing them in problem spots is an easy stretching hack. The pressure from the balled items gently presses out the leather.
Pro hiker Andrew Skurka says, “I often use wadded up newspaper or sock balls when breaking in boots to instantly relieve any pinching or toes jamming without sizing up.”
Follow these steps to stretch with newspaper or sock balls:
Pick Your Material
- Newspapers absorb moisture and easily conform to the toes when balled up.
- Clean sock pairs rolled tightly provide cushioned pressure.
- More layers allow tighter wads. Keep balls about the size of a racquetball.
Apply Leather Conditioner
- Rub moisturizing oils, balms, or wax into the boot lining first to soften.
- Makes the leather more willing to flex without cracking when under pressure.
- Pay extra attention to lubricating tight spots for prime stretching.
Insert Balls Snugly
- Tightly stuff newspaper or sock balls into the toe box or problem areas while wearing boots lightly laced.
- Ensure balls press snugly against the sides and tops of feet.
- Stand and walk around on flat ground to increase pressure from body weight.
Let Boots Rest
- Remove the balled items and re-stuff the toes before storing boots after wear.
- The interior padding keeps gently expanding the leather fibers while at rest.
- Change to fresh paper or socks daily to prevent moisture buildup.
With regular use, the pressure balls can provide localized 1/4 to 1/2 size stretch relief without compromising overall stability. Use their molding power sparingly and listen to your feet.
#7 Try a Shoe Stretch Spray

Shoe stretch sprays contain alcohol which causes the leather fibers to swell and become more pliable for stretching. When used properly, spray can aid the break-in process.
Pro hiker Andrew Skurka says, “I keep boot stretch spray in my pack to help soften any tight spots that give me trouble until I can permanently stretch the boots at home.”
Follow these steps to use the stretch spray safely:
Purchase Leather Conditioning Spray
- Look for products like Sockwell’s Stretch & Swell Boot Spray, designed for leather and suede.
- Avoid pure alcohol sprays that dry out the material.
- Leather moisturizing oils in the formula keep boots supple too.
Clean and Dry Boots
- Wipe away dirt and debris from the boots’ interior and exterior before spraying.
- Let the boots completely air dry to prevent locking in moisture.
Liberally Apply Spray
- Attach the nozzle straw, if included, to target tight or rubbed spots.
- Thoroughly saturate the lining and seams while the boots are off your feet.
- Give an extra dose to the toe box, heel, and pinching zones.
Wear Immediately
- After spraying, lightly lace-up boots and wear them for 20-30 minutes while still damp.
- The moisture plumps and softens the leather so it molds as you walk.
- Flex feet and ankles often while wearing to enhance shaping.
Use Daily
- Apply spray and wear boots daily to compound the stretching effects over time.
- Alternate with other methods like ball stretchers or boot shapers.
With consistent use, spray can aid overall stretch by making the leather more pliable. But results take time. Listen to your feet, and don’t overdo it.
#8 Use A Hair Dryer For Stretching pair of Boots

A hairdryer on a low setting can safely provide targeted heat to relax and expand tight leather boots. The warmth temporarily makes the material more pliable.
Renowned hiker Ed Viesturs says, “I always blast my stiff new boots with a hair dryer while wearing them to help speed the break-in process.”
Follow these steps to stretch boots with a hair dryer:
Prep the Boots
- Use leather conditioner on the lining first to prevent heat damage and keep it supple.
- Loosen laces over the tightest areas to focus heat there.
- Have room-temperature thin socks ready to wear after.
Warm Problem Areas
- Insert boot shapers if you have them to hold from.
- Switch a hair dryer to the low or medium heat setting. Keep it moving continuously.
- Slowly wave the nozzle over tight spots like the toe box for 60-90 seconds.
- Avoid holding it in one place too long to prevent damage.
Walk to Set Shape
- Immediately put on thin socks and shoes after heating.
- The leather is still pliable from the warmth and will mold as you walk.
- Continually flex feet and ankles while taking steps to enhance shaping.
Repeat Daily
- Apply heat, then walk in boots daily to improve stretching over time.
- Alternate with wearing them normally to reinforce the expanded fit.
With care, targeted heat can provide temporary stretch relief to get through a hike safely. But results take time. Listen to your feet.
#9 Using Alcohol, or Steam to Stretch Hiking Boots

You can use rubbing alcohol, mild heat, or steam to temporarily soften and expand leather hiking boots for quick stretch relief. But take care not to overheat and damage the material.
As experienced hiker Andrew Skurka says, “When breaking in stiff boots, I regularly use a hair dryer or hot towel to temporarily make the leather more pliable before a long hike.”
Follow these safe steps to heat stretch boots:
Prep Boots Properly
- Clean and fully dry boots first to prevent locking in moisture.
- Apply leather protector cream to the lining to protect from heat damage.
- Loosen laces over the tightest spots to target heating there.
Use Alcohol, or Steam Briefly
- Rubbing alcohol – Briskly apply to the inside using a cloth and let dry for 5 minutes.
- Hair dryer – Wave over problem areas for 30-60 seconds on low/medium settings while wearing boots.
- Hot towel – Moisten, wring out, and place inside boots for 2-3 minutes. The steam expands fibers.
Walk Immediately After
- Immediately stand and walk around after heating while the leather is still relaxed and pliable.
- Continually flex feet and ankles while taking steps to enhance shaping.
- The warmth lets the material mold closer to your feet.
Repeat Daily
- Apply controlled heat, then walk in boots daily to improve stretching over time.
- Alternate with other methods like ball stretchers or boot trees.
With care, heat can provide slight temporary stretch relief. But boots need repeated wear to fully form to your feet. Listen for pinch points.
#10 Using Oils and Moisturizers to Stretch Your Hiking Boots

Regularly massaging leather conditioners and natural oils into boots softens the material so it more readily stretches and molds to your feet. The emollients keep the leather supple.
As experienced hiker, Ed Viesturs says, “I oil and grease my boots every night on long expeditions to keep the leather pliable as I break them in.”
Follow these steps to use oils properly:
Select the Right Formulas
- Pick all-natural moisturizers without harsh chemicals.
- Mink oil or beeswax conditioners work well for waterproof leathers.
- For nubuck or suede, try coconut or olive oils.
- Jojoba, lanolin, or shea butter also penetrate the leather.
Fully Clean Boots First
- Remove all dirt and debris from the boots’ exterior and interior before oiling.
- Let the pair fully air dry to prevent trapping moisture.
- Pay attention to cleaning the extra snug spots well.
Thoroughly Massage In
- Apply a generous amount of conditioner inside the boots.
- Briskly rub into the lining, seams, and any tight areas using a cloth.
- Ensure leather soaks in oils completely so fibers are flexible.
Reapply Frequently
- Oil boots daily as you wear them while breaking in.
- Reactivate the moisturizing process before and after each use.
- Alternate oiling with other stretching techniques.
With regular use, oils can make the break-in process smoother. But listen for pinch points indicating poor fit. Don’t over-oil to compromise durability.
#11 Using Moleskin and Insoles to Stretch Your Boots

Applying soft moleskin padding or supportive insoles in strategic spots can help relieve pressure from tight boots as you break them in. It provides cushioning until the materials stretch fully.
Famous Appalachian Trail hiker Cheryl Strayed says, “Moleskin sheets were a lifesaver over my blister hot spots when my too-snug boots rubbed raw on long days.”
Follow these steps to use moleskin or insoles:
Identify Pain Points
- Pinpoint where the boots cause the most friction or dig in while wearing them.
- Common areas are heels, ankles, arches, and toes.
- Visual red spots and hot, tender skin indicate problem zones.
Apply Thick Moleskin Padding
- Cut soft moleskin sheets into small patches to cover irritated areas. Avoid the seams.
- Place them sticky-side down directly on your feet before slipping boots on.
- The extra cushioning prevents the leather from biting into the skin as you break them in.
Use Supportive Insoles
- Swap out thin stock insoles for more cushioned, contoured versions like Superfeet.
- It takes up the volume inside, creating space and reducing pressure points.
- Look for extra padding at the toe box, arch, and heels.
Reuse Until Broken-In
- Continue using the padding and insoles until the boots feel comfortable worn all day.
- Replace moleskin frequently as it wears down in spots.
The cushioning eases friction pain but listen for sizing issues like heel slippage or jammed toes, which require sizing up. Don’t just mask poor fit long-term with padding.
#12 Seek Professional Help ─ Visit A Cobbler

Most shoe repair shops offer boot stretching services for stubborn boots that won’t give with home methods. Cobblers have specialized tools to target different parts of the foot for maximum stretch.
Seeking professional help from a skilled shoe cobbler can safely stretch leather boots more than risky at-home methods. Cobblers have specialized tools to target problem spots without overdoing it.
As expert hiker Ed Viesturs says, “Having my local gear shop stretch my boots with their professional boot stretcher saved me from excessive painful break-in.”
Follow these steps to maximize results from cobbler stretching:
Find a Qualified Cobbler
- Search for an experienced shoe repair pro with great reviews for quality work.
- Ask trusted hiking shops who they recommend or if they offer boot services.
- A master cobbler qualification indicates advanced boot knowledge.
Bring New, Unworn Boots
- Bring brand-new, unworn boots to the cobbler for maximum stretch rather than used ones.
- Fresh leather gives the most versus boots already molded to your feet.
- Be prepared to be without boots for 1-2 days during service.
Communicate Problem Areas
- Show the cobbler precisely where the boots are too tight on your feet.
- Request they focus stretch efforts only on problem zones, not overall.
- A heated pain point is the toe box but also check the instep, sides, and heels.
Let Them Work Slowly
- Quality stretching takes patience, not force. Advise the cobbler to increase incrementally.
- Rapid, drastic stretching weakens the leather and risks damage.
- Err on the side of slightly under-stretching for best results.
With the right specialist, boots can safely gain up to 1 full size. But the process takes time. Listen to expert guidance. Many cobblers will also apply collagen, silicone, or alcohol-based sprays during stretching to soften and expand leather further. The treatment keeps the fibers pliable as you break in.
Pros and Cons of Stretching Hiking Boots
| Pros | Cons |
|---|---|
| Saves money – Stretching boots you already own costs less than buying new ones. | Limited stretch range – Leather boots only expand about 1 full size at most. Synthetics give even less. |
| Custom-fit – Breaking in molds boots to the shape of your feet | Compromise support – Over-stretching more than 1 full size reduces stability, structure, and durability |
| Prevents waste – Stretching extends the life of your boots | Masks poor fit – Stretching boots the wrong size can hide improper fit and cause injury |
| Quick relief – Simple stretching tricks provide immediate temporary relief | Takes time – Breaking in boots properly is gradual, not a quick fix |
| Fine-tune fit – Helps accommodate foot swelling on long hikes | Can cause injury – Jamming feet into radically too-small boots restricts circulation |
While there are ways to stretch stiff, tight hiking boots at home, it’s not necessarily the best solution for everyone. Below are some key pros and cons to help determine if stretching is right for your needs:
Pros
- Saves money – Stretching boots you already own costs little compared to buying a new, correctly fitted pair. DIY methods require only household materials.
- Custom-fit – Breaking in boots molds them closer to the exact shape of your feet for a personalized feel.
- Prevents waste – You avoid throwing away quality boots that just need slight sizing adjustments. Stretching extends use.
- Quick relief – Simple stretching tricks like thick socks or shoe stretchers provide immediate temporary relief on the trail if boots suddenly feel too tight.
- Fine-tune fit – Stretching helps accommodate slight foot swelling on long hikes or during pregnancy.
Cons
- Limited stretch range – Leather boots only expand about 1 full size at most. Synthetics give even less. Stretching has limits.
- Compromises support – Over-stretching more than 1 full size severely compromises stability, structure, and durability.
- Masks poor fit – Stretching boots the wrong size can cover up underlying improper fit and cause injury.
- Takes time – Breaking in boots properly is a gradual process, not a quick fix. Rushing leads to damage.
- Can cause injury – Jamming feet into boots radically too small restricts circulation and leads to serious foot pain.
Weigh your specific situation and the design of the boot. Stretching can extend use if done carefully for the right boots. But don’t force what was always the wrong size. Prioritize fit first before relying on heavy modification. If pain persists, consult a footwear expert for guidance.
How Should Hiking Boots Fit?
Here are the key points that determine how hiking boots should fit:
- Heels should grip snugly with a minimal lift when walking
- Toes should have wiggle room – about 1 thumb’s width from the front
- The foot should be stable with good arch support when laced
- No pinching, rubbing, or Numbness around ankles or toes
- Tongue and laces should hold the foot securely in place
- The width should hug the foot without squeezing – try wide sizes if they are too narrow
- Length allows toes to flex comfortably when going uphill/downhill
- Lightly snug all over at first to allow for break-in stretching
- Cushioned hiking socks worn should not impact fit
- Walk around the store with weight on your feet to test – not just try sitting
- Focus on performance feel oversize number listed
The right hiking boots stabilize and support feet over uneven terrain. They prevent injury while allowing full mobility. Expect some break-ins as boots mold to your feet. But proper initial fit means no pain or loose slippage.
When to Size Up Your Hiking Boots
While there are ways to stretch hiking boots at home, sometimes ill-fitting boots need to be sized up for proper comfort and performance. Don’t try to make overly tight boots work through heavy break-ins. Extreme stretching compromises durability and safety.
Consider sizing up:
- If your toes hit the front of the boot when going downhill, size up. The impact on descents can cause toe injuries if your boots are too short.
- Size up if you feel rubbing or hot spots on your heels or ankles. Proper boot length will prevent heel slippage that leads to blisters.
- If your boots feel too tight across the ball of your foot or toes after being broken in, size up. Boots should not restrict toe splay and natural foot expansion when walking.
- Size up if you need to wear two pairs of socks to avoid pain or numbness. Wearing too many socks to compensate for a small boot can constrict circulation.
- If you have ankle stability issues or roll your ankles in your boots, size up. The extra room allows you to cinch up boot laces for more ankle support.
- If your toenails hit the front of the boot and leave black and blue marks, size up. Long descents can cause toe injuries without enough room to spare.
- If you have wide feet, size up. Boots stretch lengthwise but not in width – wider boots prevent pain from squeezing into narrow models.
Pro Tip
Don’t try to alter boot length more than a 1/2 size up or down. For proper stability and traction, heel fit trumps toe room. Consider foot width and volume along with length. The right boots should fit snugly out of the box but not constrict. Trust your feet!
Frequently Asked Questions About Stretching Hiking Boots
- Toes jamming into front of boot causing black nails, bruising, or lost nails
- Restricted blood flow and numbness in toes due to constriction
- Blisters on heels and ankles from friction and slippage
- Pain in ball of foot and toes from lack of expansion room
- Lacing too tight to compensate for small size, cutting off circulation
- Poor stability and ankle support, leading to rolling ankles
- Excess moisture and heat build-up without breathing room
- Premature wear and tear as feet bang against ends
- Tripping hazards as toes catch on terrain if too short
- Aggravating bunions, corns, and other foot conditions
- Causing or worsening conditions like neuromas or plantar fasciitis
- Discomfort and fatigue from lack of cushioning and support
- Low tread durability from improper foot strike due to limited space
Yes, most local shoe repair and shoe stores offer professional boot stretching services. Experienced cobblers use specialized equipment like mechanical boot stretchers and metal bars to quickly expand and widen tight boots without overstressing the leather.
It depends on the type of leather and construction, but quality full-grain all-leather boots can stretch up to a full size from new to fully broken in. Here are the average stretch ranges:
- Full-grain leather boots – Up to 1 full size
- Split-grain leather boots – 1/2 to 3/4 size
- Suede or nubuck leather – 1/4 to 1/2 size
- Synthetic leather/mesh boots – 1/4 size maximum
Yes, hiking boots are designed to mold and conform closer to your feet over time as the materials soften and break in.
Leather and some synthetic hiking boots can be stretched slightly in specific tight spots if too small. But stretching more than 1 full size beyond proper fit compromises stability and structure.
You can stretch your boots at home cheaply using DIY methods. But expect to pay $20-$40 to have a cobbler professionally stretch your boots using proper tools. Many outdoor gear and boot retailers also offer in-house boot fitting services for around $25 per foot. It helps safely stretch boots without over-straining.
On average, expect leather hiking boots to expand between 1/4 and 1 full inch when properly broken in. Synthetics may only give 1/8 inch.
Shoe stretch sprays like Sockwell’s Boot Stretch Spray can provide moderate stretch relief when used properly over time. The alcohol-based formula helps swell and relax the leather so it molds more when flexed or stretched.
But results take a consistent, patient application and other methods like wearing and mechanical stretching. Don’t expect to spray alone to drastically stretch stiff boots. Use as a supplemental softening treatment.
Synthetic mesh or nylon hiking boots generally have less give than full leather. While methods like heat can provide slight temporary stretch, synthetics will not permanently mold to your feet like leather. Look for wide-size options or size up early rather than expecting heavy stretch.
Stretching the length of a boot compromises stability on the trail. Really focus stretching on any tight spots in width, which a wide size can often solve. The boots are likely too short if your toes slam the front while walking downhill. Go up at least 1/2 size.
Properly fitted hiking boots shouldn’t cause pain out of the box, but expect them to be snugger than regular shoes. Mild discomfort that eases after 30 minutes of wear is normal while breaking in. Blister-causing hot spots or numbness signals poor size or fit. Don’t wait for heavy break-ins expecting issues to resolve.
Expect leather hiking boots to mold closer to your feet, around 1/8 inch per week of daily wear. So stretching a full size takes 2-3 months of regular use with other methods. Synthetics may only give 1/16 inch per week. Gauge stretch by fit rather than time. Properly fitted boots should mold to your feet without heavy modification.
Conclusion
And there you have it – the inside scoop on maximizing your hiking boot stretch. While snug boots can be coaxed into a custom fit, remember there are limits. Prioritize starting with a properly fitted pair, then use targeted techniques to finesse the shape.
With the powers of pressure, ice, heat, and oil harness in your quest for a second-skin-like feel, you’re ready to transform even the stubbornest boots. As you follow this journey from temporary fixes to strategic break-ins, take it slow and heed hotspots.
Let your feet guide you toward precision. With the right fit, each step will feel like floating across the wilderness.
Now that you’ve mastered the art of the stretch, those dream hikes are calling your name. Here’s to many more miles of blissful, blister-free adventure ahead! Happy trails.

MARK RODRIGUEZ
Mark is an experienced backpacker who has completed several multi-day hikes, including the John Muir and Wonderland Trail. He is also a hobbyist photographer who delights in capturing the captivating essence of nature through his camera lens. Mark is passionate about environmental conservation and often volunteers for trail maintenance and clean-up projects.


Pingback: How Hiking Boots Should Fit?
Pingback: Can Hiking Boots Be Resoled For Extraordinary Longevity? For Extraordinary Longevity?