Hiking boots should have about one to two fingers of space between your toes and the front of the boot. This space is essential because it prevents blisters and allows your feet to swell on longer hikes.
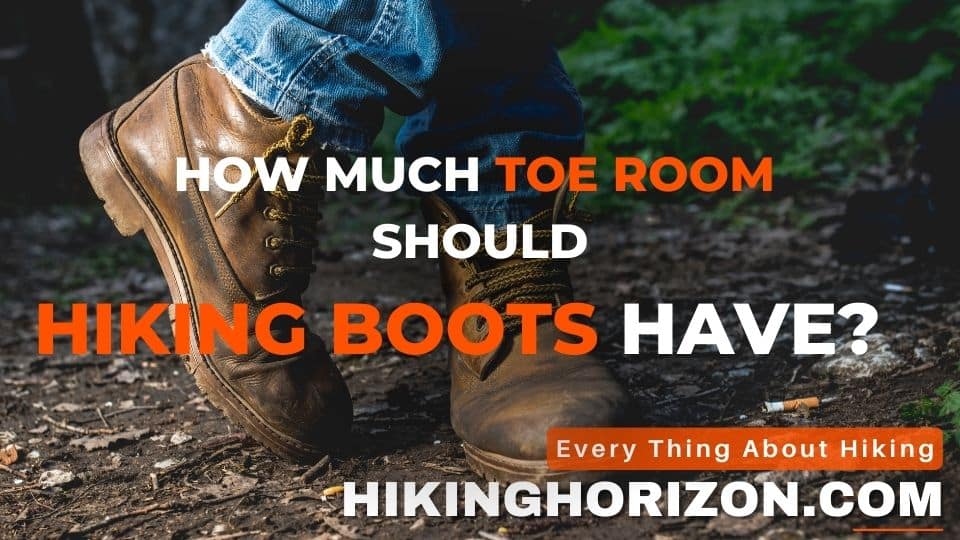
Exploring the great outdoors is an exhilarating experience, but only when you have the right gear. One essential piece of equipment is hiking boots; the perfect fit can make all the difference. But how much toe room should hiking boots have for a perfect fit?
Proper hiking boots are crucial to ensure a comfortable and enjoyable hiking experience. One crucial aspect to consider when selecting the right pair is the amount of toe room they provide. In this article, we’ll find the answer to the question, How Much Toe Room Should Hiking Boots Have? And discuss the anatomy of hiking boots and the ideal toe room for perfect hiking.
Table of Contents
How much toe room in hiking boots is enough?

When trying hiking boots, you’ll want to ensure sufficient room for your toes to wiggle and move around. Too tight boots can cause painful blisters as your toes rub together with each step.
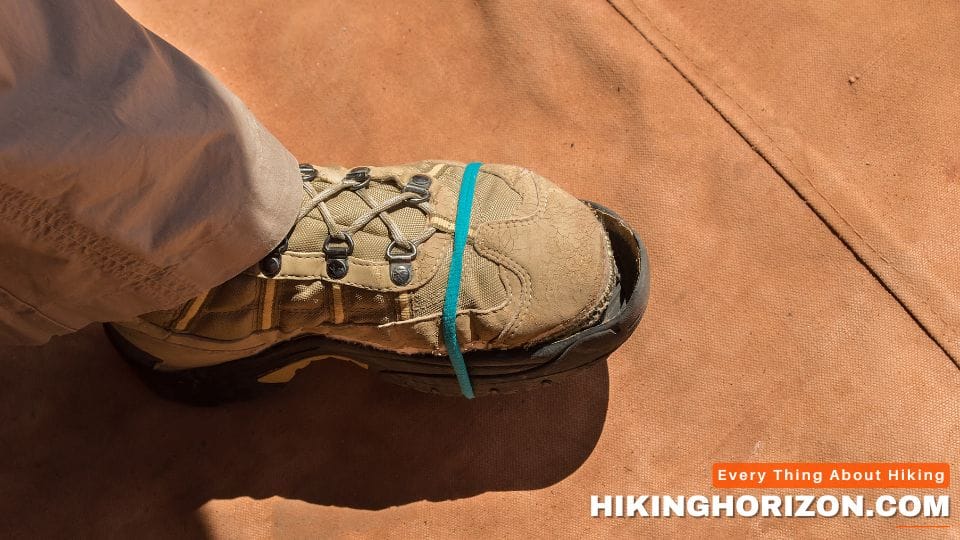
Aim for at least an inch of space between your big toe and the tip of the boot. This extra room allows your feet to swell a bit on long hikes without your toes jamming into the front. More toe room also lets your feet splay naturally as you walk, improving stability on uneven trails. Ensure your toes don’t hit the end as you walk downhill.
Specifically, your heel should be locked into the heel of the boot, which helps reduce friction. The less resistance you create, the fewer blisters you will get.
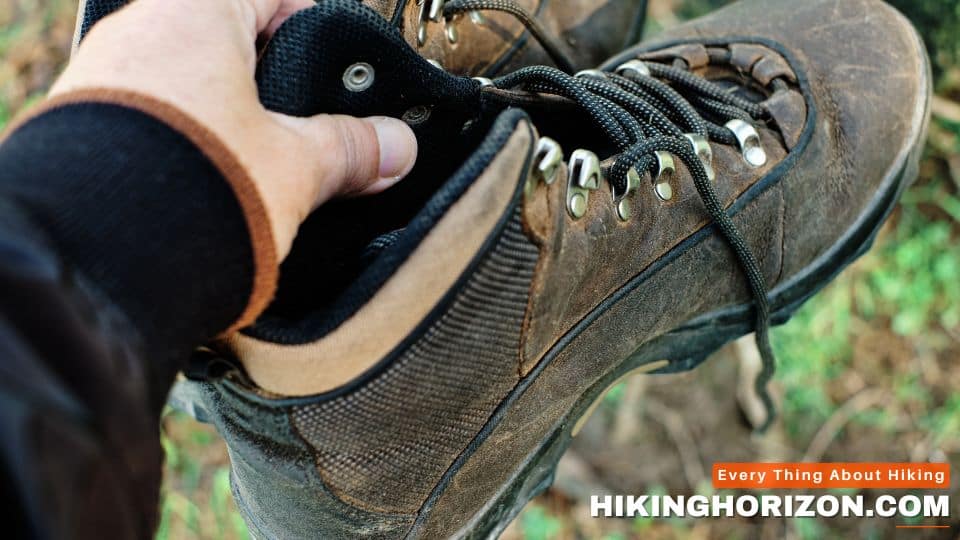
If you’re unsure about the fit, try removing the insole and placing your foot on top to see how much extra room there is. Though not required, this can give you a sense of the toe box size relative to your foot. The ideal hiking boots should cradle your feet without constricting toe movement.
Related Article: How Should Hiking Boots Fit?
What Are The Drawbacks Of an Ill-Fitted pair of hiking Boots?
Wearing ill-fitted hiking boots can ruin your hiking experience and cause serious foot injuries. Here are some of the major drawbacks:
- Blisters and hot spots – Too-tight boots pinch and rub against the skin, creating painful blisters and hot spots on your feet as you hike. These can get infected and make walking unbearable.
- Toenail loss – Boots that are too short bang against your toenails with every step, eventually leading to bruised, detached, or lost toenails. It is extremely painful.
- Ankle instability – Boots with poor ankle support let your ankle roll unnaturally on uneven terrain, spraining or fracturing. It can sideline you from hiking for months.
- Long-term joint pain – The incorrect fit alters your gait, putting excess stress on your knees, hips and back. Over years of hiking, this leads to the early onset of arthritis and joint injuries.
- Falls and accidents – Ill-fitting boots that slip or chafe make you prone to losing footing on slick surfaces. It can lead to nasty falls, twisting your ankles or worse.
The discomfort and safety hazards caused by bad boot fit make hiking dangerous and not enjoyable. Take the time to find well-fitted boots, even if it means trying on many pairs. Your feet will thank you in the long run.
Related Article: How to Prevent Blisters While Backpacking?
How Much Toe Room Should Hiking Boots Have? Expert Opinions

There is no one-size-fits-all answer to how much toe room should hiking boots have, as it largely depends on the shape of your foot and your personal preferences. However, many experts recommend the following guidelines:
A Thumb’s Width of Space
According to Dr. Jenny Sanders, a board-certified podiatrist and outdoor enthusiast, a thumb’s width should be between your longest toe and the front of the hiking boot. During a hike, it allows for some wiggle room and natural expansion of your feet. Dr. Sanders explains, “Having enough space in the toe box is crucial for avoiding foot pain and potential injuries while hiking.”
Wiggle Room
Peter Limmer, a fourth-generation bootmaker at Limmer & Sons, emphasizes the importance of wiggle room in the toe box. He says that your toes should be able to wiggle freely in the toe box without feeling cramped or restricted. It can help prevent blisters and other foot issues during long hikes. Limmer notes, “Proper toe room ensures that your feet can move naturally and comfortably, which is essential for maintaining foot health on the trail.”
By following expert advice and considering your foot shape and preferences, you can find the right balance of toe room in your hiking boots. Remember that comfort is key, and trying on multiple pairs to find the best fit for your feet is always a good idea.
What Podiatrists Say: how much room toes have in hiking boots

Podiatrists are foot health experts who can provide valuable insights into the importance of toe room in footwear, including hiking boots. Let’s explore what they say about this crucial aspect of foot comfort and health.
Adequate Toe Room Prevents Common Foot Problems
Podiatrists emphasize the importance of a proper toe room to prevent common foot problems such as blisters, calluses, and bunions. Dr. Jackie Sutera, a podiatrist and spokesperson for the American Podiatric Medical Association, explains that “adequate toe room is essential for maintaining healthy feet during physical activities like hiking, as it allows your feet to breathe and reduces the risk of developing foot issues.”
Support for Natural Foot Movement
Enough toe room in your hiking boots allows your toes to splay naturally and provides better balance and stability. Dr. Jane Anderson, a board-certified podiatrist, highlights the importance of toe room by stating, “When your toes have room to move freely, they can function optimally, providing better support and balance during your hikes.”
Accommodating Foot Swelling
Podiatrists also recommend ample toe room to accommodate foot swelling during long hikes. Dr. Robert Kornfeld, a podiatrist specializing in sports medicine, says, “When you hike, your feet are likely to swell due to increased blood flow and pressure. Having enough toe room in your boots is essential to prevent discomfort and potential injuries.”
Consider Foot Shape and Personal Preferences
Podiatrists agree that the ideal amount of toe room varies depending on individual foot shapes and personal preferences. A podiatrist and human movement specialist, Dr. Emily Splichal, advises, “It’s essential to find a boot that accommodates your unique foot shape and provides a balance between support and comfort.”
Podiatrists stress the importance of adequate toe room in hiking boots to maintain foot health, prevent common foot problems, and support natural foot movement. By considering expert insights and your personal preferences, you can find the right balance of toe room in your hiking boots for a comfortable and enjoyable experience on the trail.
Factors to Consider When Assessing Toe Room in Hiking Boots
| Factor | Description |
|---|---|
| Foot shape | Wider or longer feet may need more toe room. Narrow feet may prefer a snugger fit. |
| Sock thickness | Thicker socks take up more space, so size up boots accordingly. |
| Terrain and hiking style | Precise fit needed for technical terrain. More room ok for flat trails. |
| Foot swelling | Ensure enough space to accommodate swelling on long hikes. |
| Boot material and break-in | Leather boots stretch; synthetic boots won’t. Size accordingly. |
How To Measure Toe Room for Perfect Fit

Measuring your ideal toe room in hiking boots is essential in finding the perfect fit. Here’s a step-by-step guide to help you determine the right amount of toe room for your needs:
1. Gather Your Materials
To measure your ideal toe room, you’ll need the following materials:
- A pen or pencil
- A ruler or measuring tape
- A sheet of paper
- The socks you plan to wear while hiking
- A chair or bench to sit on
2. Prepare Your Feet
Put on the socks you plan to wear while hiking. To measure your feet for hiking boots, sit on a chair or bench with your feet flat on the ground and your legs bent at a 90-degree angle.
3. Trace Your Foot
Place the sheet of paper on the floor, and place your foot on it. Make sure your heel is against a wall or any straight vertical surface. Using the pen or pencil, trace the outline of your foot onto the paper, keeping the pen as vertical as possible.
4. Measure Your Foot Length
Using a ruler or measuring tape, measure the length of your foot from the longest toe to the heel. Record this measurement in inches or centimeters.
5. Determine Your Ideal Toe Room
To estimate the ideal toe room for your hiking boots, add a thumb’s width (approximately 1/2 inch or 1.27 cm) to your foot length measurement. This extra space will allow your toes to wiggle comfortably and accommodate foot swelling during your hikes.
6. Compare Your Measurement to Boot Sizes
Refer to the sizing chart provided by the hiking boot manufacturer. Compare your adjusted foot length measurement to the chart to determine the perfect size for your needs.
7. Try on Hiking Boots
With your ideal toe room measurement in mind, try on hiking boots in the size that matches your adjusted foot length. Wear the same socks you plan to use on the trail and walk around the store to ensure a comfortable fit. Your toes should have plenty of room to wiggle without sliding forward, and your heel should be snug and secure in the boot.
You can find the perfect fit for a comfortable and enjoyable hiking experience by measuring your ideal toe room and trying on boots accordingly.
Must read: Do New Hiking Boots Need Breaking In If They Aren’t Stiff?
How to Determine If There Is Enough Toe Room in Your Hiking Boots?
Here are some tips on how to determine if there is enough toe room in your hiking boots:
- Wiggle your toes – There should be enough space to wiggle your toes inside the boot freely. There is not enough toe room if your toes feel constricted or cramped.
- Thumb test – With your foot flat on the ground, press your thumb between your toes and the front of the boot. You should have about a thumb width (1/2-1 inch) of space. Any less and the toes will get squeezed on descent.
- Toe bang test – Walk downhill or tap your toes downward against the front of the boot. Your toes should not bang or jam into the front. If they do, the boot is too short.
- Comfort when kicking steps – You should be able to plant your foot and comfortably kick steps in snow or dirt without toe impact. Tight boots will restrict this motion.
- Try boots with weight – Lace up the boots and walk around the store with a loaded backpack to replicate hiking conditions. Monitor for any pinching or toe discomfort.
- Listen to your feet – Don’t ignore any pinching, numbness or loss of circulation. Even if a boot passes all other tests, discomfort means sizing up.
Finding hiking boots with adequate toe wiggle room is essential to preventing toenail loss, blisters, and blackened nails on the trail. Follow these tips to get the right fit.
Lacing Techniques: make sure you have enough Toe Room

Adjusting how you lace your hiking boots can help create more toe room and improve overall comfort. Here are a few lacing techniques you can try to give your toes some extra space:
1. Window Lacing (aka Box Lacing)
Window lacing creates a “window” or “box” in the lacing pattern, relieving pressure on the top of your foot and providing more room in the toe box.
- Begin lacing your boots as usual, stopping when you reach the eyelets directly above the tight or pressure-sensitive area.
- Rather than crisscrossing the laces, thread them vertically through the adjacent eyelet on the same side.
- Continue lacing the boots as usual, crossing the laces over each other above the “window” you’ve created.
2. Skip Lacing
Skip lacing involves skipping eyelets to reduce pressure on specific areas of your foot, creating more room in the toe box.
- Start lacing your boots normally.
- When you reach the eyelets above the tight or sensitive area, skip one eyelet on each side, and continue lacing the rest of the boot.
- Adjust the tightness of the laces above and below the skipped eyelets to ensure a secure and comfortable fit.
3. Toe-Relief Lacing
Toe-relief lacing reduces pressure on the toes by starting the lacing higher up on the boot.
- Begin by removing the laces from the bottom eyelets closest to your toes.
- Start lacing at the second set of eyelets, crossing the laces as usual.
- Continue lacing the boot normally, leaving the bottom eyelets empty.
4. Double Heel-Locking Lacing
Double heel-locking lacing helps secure your heel, preventing your foot from sliding forward and giving your toes more room in the toe box.
- Lace your boots as usual, stopping at the second-to-last eyelet.
- Thread the laces vertically through the top eyelet on the same side, creating a loop.
- Cross the laces and insert them through the loops on the opposite sides.
- Pull the laces tight to lock your heel in place, and continue tying your boots as usual.
Experiment with these lacing techniques to find the best one for you. Adjusting your laces can help create more toe room, improving comfort and preventing common foot problems during your hikes.
Lacing Techniques to Create More Toe Room
| Lacing Technique | Description | Effect on Toe Room |
|---|---|---|
| Window lacing | Create a “window” or “box” in lacing pattern above foot | Relieves pressure on top of foot, creates more toe room |
| Skip lacing | Skip eyelets above tight or sensitive areas | Reduces pressure, creates more toe room |
| Toe-relief lacing | Start lacing at 2nd or 3rd set of eyelets, leave bottom eyelets near toes empty | Reduces pressure on toes, creates more toe room |
| Double heel locking | Thread laces vertically through heel eyelets to lock in place | Prevents foot sliding forward, allows more toe room |
| Loose lacing | Lace loosely, especially at bottom near toes | Allows more room for toes to spread out |
| Wide lacing | Use wider spaced eyelets near toes | Creates more space in toe box area |
| Low-criss lacing | Crisscross laces low near toes, straight lacing above | Balances snug heel with roomy toe box |
| Heel lock lacing | Crisscross laces through heel eyelets | Locks in heel, prevents sliding forward |
| Runner’s lacing | Crisscross laces throughout boot | Creates even pressure distribution |
Types of Hiking Boots and Their Toe Room Requirements

Different types of hiking boots cater to various needs and trail conditions, which can influence their toe room requirements. Here’s an overview of the common types of hiking boots and their toe room considerations:
1. Trail Shoes
Trail shoes are lightweight, flexible, and designed for day hikes on well-maintained trails. They usually have a low to mid-cut profile and offer less ankle support than other hiking boots. The toe room in trail shoes should be ample enough to accommodate foot swelling and allow your toes to wiggle freely but not too loose, as this could cause instability on uneven terrain.
2. Hiking Shoes
Hiking shoes are a step from trail shoes, offering more support and durability for longer day hikes and backpacking trips on moderate terrain. These shoes generally have a mid-cut profile and provide better ankle support. Hiking shoes should have a comfortable toe box that allows your toes to move naturally while providing enough space to accommodate foot swelling on longer hikes.
3. Backpacking Boots
Backpacking boots are designed for multi-day hikes with heavy backpack loads, offering increased support, durability, and protection. They usually have a high-cut profile and feature stiffer soles for stability on uneven terrain. When choosing backpacking boots, ensure a thumb’s width between your longest toe and the front of the boot to accommodate foot swelling and prevent blisters or other foot issues.
4. Mountaineering Boots
Mountaineering boots are built for extreme conditions like high-altitude treks or glacier travel. They offer maximum support, insulation, and durability and typically have a high-cut profile with stiff soles compatible with crampons. Due to the demanding nature of mountaineering, it’s crucial to have ample toe room in these boots to accommodate thicker socks, foot swelling, and natural foot movement during long and strenuous hikes.
When selecting hiking boots, it’s essential to consider the type of terrain and conditions you’ll encounter on your hikes. Ensure your boots have the appropriate amount of toe room based on your needs and the boot’s intended use. By finding the right balance between comfort and support, you can enjoy a more comfortable and enjoyable experience on the trail.
Factors to Consider When Assessing Toe Room in Hiking Boots

When determining the ideal amount of toe room in your hiking boots, there are several factors to consider. These factors will help you find the perfect fit for your feet and ensure a comfortable and enjoyable hiking experience.
Foot Shape
The shape of your foot plays a significant role in determining the right amount of toe room for your hiking boots. People with wider feet or longer toes may require more space in the toe box, while those with narrow feet or shorter toes might find a snugger fit more comfortable. It’s essential to choose a boot that accommodates the unique shape of your foot.
Sock Thickness
The thickness of the socks you wear while hiking can impact the fit of your boots, including the amount of toe room. When trying hiking boots, wear the same type of socks you plan to use on the trail to ensure an accurate fit. If you prefer thicker, cushioned socks, you may need to size up your boots to accommodate the extra bulk.
Terrain and Hiking Style
The terrain you’ll be hiking on and your hiking style can also influence the toe room you need in your boots. For instance, tackling steep inclines or technical terrain may require a more precise fit to maintain better control and stability. On the other hand, if you’re hiking on flat, well-maintained trails, a more relaxed fit with extra toe room might be suitable.
Foot Swelling
Your feet can swell during long hikes due to increased blood flow and pressure. It’s essential to consider this when assessing toe room in your hiking boots. Ensure enough space to accommodate swelling without causing discomfort or restricting blood flow.
Boot Material and Break-in Period
The material of your hiking boots and the break-in period can also impact the amount of toe room. Some boots, especially leather ones, may stretch and conform to your feet over time. In this case, a snugger fit initially might be appropriate. However, for boots made of synthetic materials with little to no stretch, ensure adequate toe room from the beginning.
By considering these factors, you can strike the perfect balance of toe room in your hiking boots, resulting in a more comfortable and enjoyable hiking experience on the trail.
Tips For The Hiking Boot Fit with Enough Toe Room
Finding the perfect hiking boot fit with adequate toe room can make all the difference on the trail. Here are some practical tips that will help you find the right pair for your needs:
1. Shop in the Afternoon or Evening
Your feet swell throughout the day, so shopping for hiking boots later in the afternoon or evening will give you a more accurate fit. It ensures that your boots have enough toe room, even when your feet are at their largest.
2. Measure Both Feet
It’s common for one foot to be slightly bigger than the other. When selecting a boot size, measure both feet and base your decision on the larger foot to guarantee sufficient toe room in both boots.
3. Consider Insoles or Orthotics
If you use insoles or orthotics, bring them with you when trying on hiking boots. These can change the boot’s fit and may require you to size up to accommodate the extra space they take up.
4. Take Your Time
Don’t rush the process of finding the perfect fit. Take your time to try on multiple pairs of boots from different brands and models. If possible, walk around the store, test them on inclines and declines, and ensure your toes have enough room to wiggle without sliding forward.
5. Assess the Heel Fit
While toe room is essential, don’t neglect the fit around your heel. Your heel should be snug and secure in the boot without slipping or causing discomfort. A well-fitted heel can help prevent blisters and provide better support on the trail.
6. Consult with Sales Staff
If you’re shopping at a specialty outdoor retailer, use the knowledgeable sales staff. They can help you find the right boot for your foot shape, hiking style, and personal preferences, including the ideal amount of toe room.
7. Be Prepared to Break Them In
Even the perfect pair of hiking boots may require a break-in period. Start with short walks around your neighborhood or local park to break them in gradually. It will help the boots conform to your feet, ensuring the best fit possible.
By following these tips, you’ll be well on your way to finding the perfect hiking boot fit with enough toe room for a comfortable and enjoyable hiking experience.
Related Articles:
What if your hiking boots are too big?
When buying hiking boots, it’s important to get the right hiking boot fit and make sure you have enough toe room space. If your hiking boots are too big, you won’t get the proper support and stability you need on the hiking trail.
Having too much space in your hiking boots can cause your feet to slide around, leading to blisters and hot spots. The extra room also allows your toes to slam into the reinforced toe area on descents, which can be quite painful after miles on the hiking trail.
Try on the boots and make sure to wiggle your toes – you should have enough room to wiggle your toes, but not so much that they are swimming in the boot. Your toes and the end of the boot should have about half an inch to an inch of toe room space. When trying your hiking boots, focus on how the right hiking boot feels and how much or too little toe room space you have.
If you already have a pair of hiking boots but realize you don’t have enough toe room, try on the boots later in the day when your feet are a bit more swollen. Wear thicker hiking socks as well to take up excess room. While properly fitted hiking boots should be snug, with enough break-in time, hiking boots will feel comfortable even with thick hiking socks.
How much room for hiking socks do you need in hiking boots?
When buying hiking boots, you need to make sure to get the right hiking boot fit and leave enough room for hiking socks. Having enough toe room space is critical for comfort on the trail.
Your toes and the end of the boot should have about half an inch to an inch of toe room space, even when wearing thick hiking socks. This leaves enough room for your toes to wiggle and prevents painful slamming into the reinforced toe area.
When trying on hiking footwear, focus on how the boots feel and how much space you have to wiggle your little toe. The right hiking boots shouldn’t be painfully tight but also shouldn’t have so much room that your foot is sliding. Try on boots at the end of the day when your feet are a bit swollen to ensure the fit is right.
Tips for Finding Hiking Boots with Proper Toe Room
| Tip | Details |
|---|---|
| Shop later in day | Feet swell throughout day, so try on boots in afternoon/evening. |
| Measure both feet | Size boots based on larger foot. |
| Consider insoles/orthotics | May need to size up to accommodate. |
| Take your time | Try multiple pairs from different brands. Walk around store. |
| Assess heel fit | Heel should be snug without slipping. Prevents blisters. |
| Consult sales staff | Staff can recommend best boot for needs and foot shape. |
| Break them in | Wear for short walks to help boots conform to feet. |
FAQs About how your hiking boots should be comfortable
Toe room is important for maintaining foot health and comfort during hikes. Having enough toe room in your hiking boots enables your feet to breathe, prevents common foot issues such as blisters and bunions, accommodates swelling, and supports natural foot movement, resulting in better balance and stability while hiking.
According to many experts, it’s recommended to have a thumb’s width of space between the front of your hiking boot and your longest toe. It allows your toes to wiggle freely and accommodates foot swelling during hikes.
Trace your foot on a paper sheet, measure the length from your longest toe to the heel, and add about 1/2 inch (1.27 cm) to this measurement. This extra space will provide comfortable toe room in your hiking boots.
Yes, lacing techniques like window lacing, skip lacing, and toe-relief lacing can help create more toe room in hiking boots, alleviate pressure on specific areas, and improve overall comfort.
While ample toe room is important, too much space can lead to instability and reduced support on the trail. It’s essential to balance enough toe room for comfort and a snug fit for stability.
Yes, different types of hiking boots like trail shoes, hiking shoes, backpacking boots, and mountaineering boots have varying toe room requirements based on their intended use, support, and the type of terrain they’re designed for.
When trying hiking boots, wear the same type of socks you intend to use on the trail, and walk around the store to ensure a comfortable fit with adequate toe room. Ensure that your toes have enough room to move without sliding forward and that your heel is secure and snug inside the boot.
Yes, wearing too thick or too thin socks can impact the toe room in your hiking boots. Wear appropriate socks for your hikes to ensure a comfortable and accurate fit.
Hiking boots may stretch slightly over time, especially in the upper materials. However, the stretch is typically minimal and should not significantly impact the toe room. Choosing boots with the right amount of toe room from the start is crucial.
Breaking in hiking boots helps soften and mold the materials to the shape of your feet, improving overall comfort. However, proper toe room should be present when you first try on the boots, as significant changes in toe room are unlikely to occur during the break-in process.
Conclusion
Finding the right toe room in hiking boots is crucial for a comfortable and enjoyable hiking experience. It’s essential to consider factors like foot shape, terrain type, and personal preferences when choosing the ideal toe room. Remember to measure your foot and try on boots with appropriate socks, experiment with lacing techniques, and consult experts like podiatrists to find the perfect fit.
With the right toe room, you can prevent common foot problems, improve balance and stability on the trail, and make the most out of your hiking adventures. Get your hiking boots laced up, hit the trails, and confidently savor the beauty of the great outdoors!

John Smith
John has been an avid hiker for over ten years and has explored some of the most challenging trails across the USA. He has completed multiple long-distance hikes, including the Appalachian and Pacific Crest Trails. John is also a certified hiking guide, leading several hiking trips for groups of all ages and skill levels.