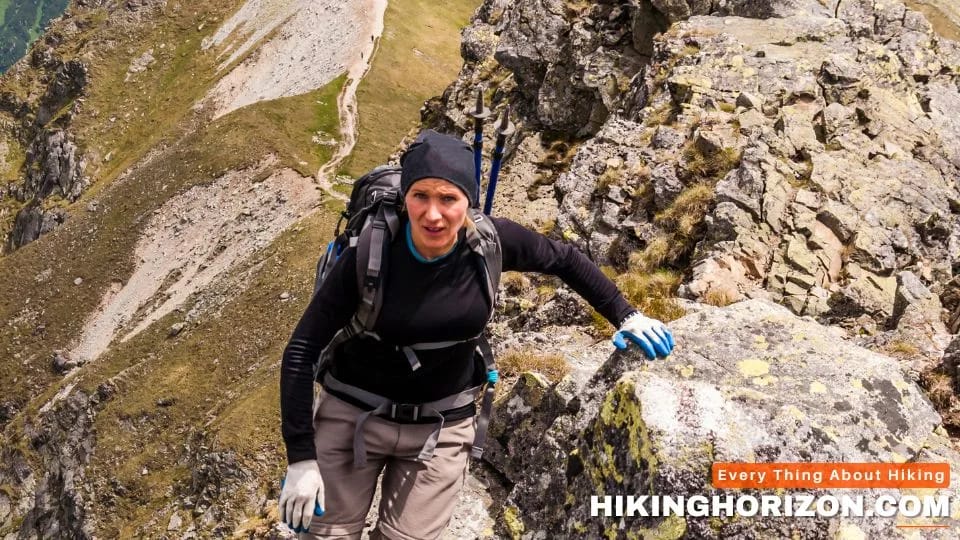
Hiking up a mountain on a well-marked trail is invigorating. Reaching the summit rewards you with breathtaking views. But for some hikers, standard trails just don’t cut it. They seek the thrill and challenge of venturing off-trail to scramble up rocky slopes.
Scrambling is an exciting activity that blends hiking with basic rock climbing. It takes you up steep terrains littered with boulders, ledges, and cliffs. It requires route-finding, using your hands, and conquering steep, exposed terrain.
This guide will explain everything you need to know about scrambling in hiking :
- What is scrambling and how it differs from hiking
- The skills and gear needed to scramble safely
- How to plan a successful scrambling route
- Common scrambling mistakes to avoid
- The amazing rewards of reaching unique summits
Whether you’re new to the sport or already have some off-trail experience, this guide will equip you with the knowledge to scramble safely. Let’s get started!
Table of Contents
what is scrambling in hiking?
Scrambling sits in between basic hiking and technical rock climbing. It involves hiking off-trail up steep, rocky slopes using your hands and body to climb.
According to legend, the term “scrambling” comes from early British climbers describing messy, undisciplined ascents in the Lake District. Today it’s an established outdoor sport requiring specialized skills.
The Mountaineers Climbing Organization defines scrambling as:
“Traveling safely over steep, rugged terrain without ropes or axes. Hands are used for balance and bruised knees are common.”
Unlike hiking, there are often no trails to follow. And unlike climbing, you don’t use ropes, harnesses or protective gear. You navigate rough, steep terrain using hands and feet to clamber up rocky gullies, ledges and blocks. Sections may require chimneying, stemming, or exposed scrambling along ridges.
It’s essential to choose routes well within your ability level and fitness. Don’t attempt exposed scrambles unless you have rock climbing experience.
Key Differences From Hiking
How exactly does scrambling differ from regular hiking?
- No trail – You navigate and pick the route instead of following a marked path.
- Steeper terrain – Hikes rarely exceed 30 degrees; scrambles go up to 50 degrees.
- Exposure – Expect big drop-offs on ridges and cliff bands. Falls have serious consequences.
- Obstacles – Getting up and over countless boulders and ledges. Expect bruises.
- More gear – Helmets, gloves, specialized shoes often required.
- Harder physically – Far greater strength, balance and stamina needed.
- Advanced skills – Requires route-finding, climbing technique, risk management.
- Greater risk – Any accident or slip can be fatal without safety ropes.
So, in summary, scrambling ratchets up both the physical and mental demands compared to hiking. It provides a step up in adventure for those seeking new challenges.
Hiking vs. Scrambling
| Feature | Hiking | Scrambling |
|---|---|---|
| Trail | Follows marked trail | No trail, route-finding required |
| Terrain Angle | Rarely exceeds 30 degrees | Up to 50 degrees |
| Exposure | Limited | Large drop-offs possible |
| Obstacles | Minor like downed trees | Large boulders, rock bands |
| Gear Needed | Basic hiking gear | Helmet, gloves, specialized shoes |
| Physical Demand | Moderate with leg strength | Full-body workout required |
| Skills | Basic hiking skills | Route-finding, rock climbing technique, risk management |
| Fall Risk | Low | High risk without safety ropes |
Why Go Scrambling?

Why would you want to scramble when hiking trails lead to most summit views? Here are the main reasons adventure seekers are drawn to scrambling:
Access Off-Limits Summits
Many breathtaking mountain peaks simply can’t be reached by trails alone. Scrambling is the only non-technical way to bag these summits.
You’ll get iconic views that most hikers miss out on. Who can resist that?
Escape Crowds
Leave other people behind by exiting the trail. No more conga lines blocking your views and ruining photos!
The solitude up high restores mental clarity. It’s just you and the mountains.
Increase The Challenge
Fit hikers can pound out most trail routes with relative ease. Venturing off-trail forces you to look for handholds, test your balance, and problem solve.
The added challenge keeps experienced hikers engaged physically and mentally.
Satisfy Your Adventurous Spirit
Some hikers simply love going where the trail ends. They enjoy picking their way up slopes and getting creative.
Scrambling scratches that off-trail itch and desire for independence.
Face Your Fears
Scrambling routes with increased exposure help build courage when facing heights and cliffs. Exposure therapy improves overall confidence.
With the right skills, you learn to move confidently instead of freezing up.
Holistic Fitness
Trail hiking builds leg strength mainly. Scrambling works your whole body – hands, arms, core, grip, balance – in addition to leg endurance. The full-body workout gives you functional fitness to handle the demands of mountains.
So in summary, scrambling lets adventure seekers access new summits, gain solitude, increase challenges, feed their spirit, build courage, and improve overall mountain fitness.
What is scrambling difficulty?
Not all scrambles are created equal. Some barely differ from hiking, while others require bouldering skills. The difficulty depends on the:
- Angle and exposure of the slope
- Size of rock holds and steps
- Presence of ledges, cracks and vegetation
To rate scrambling routes, mountaineers use a class system from Class 1 to Class 5.
What is the difference between class and scrambling grades?
Scrambling falls somewhere between hiking and rock climbing in terms of difficulty and required technical skills. To help hikers understand what to expect on their first scrambling adventure, different rating systems are used to classify scrambling routes.
The Yosemite Decimal System assigns a class rating from 1 to 5, with Class 1 being easy hiking and Class 5 being technical rock climbing requiring ropes, harnesses, and climbing equipment. Scrambling falls into Class 2 (simple scrambling using hands for balance) and Class 3 (more difficult scrambling with increased exposure).
The British grading system uses grades to rate scrambles on a scale from 1 to 3. Grade 1 scrambles require occasional use of hands for balance on relatively easy terrain. Grade 2 refers to scrambling, where hands are more consistently used for balance, and Grade 3 is for harder scrambles with more sustained rocky climbing and increased exposure.
Understanding both the class and grade of a scrambling route helps hikers judge the difficulty level and whether they have the necessary skills and experience to complete the scramble safely. While classes refer generally to the technical requirements, grades offer more nuance on the physical challenge and exposure. Checking both will prepare you for popular scrambling adventures like those found in places like Yosemite and the Rocky Mountains.
Here is a brief introduction to these classes;
Class 1 Scrambling
This is basically just steep hiking and barely qualifies as scrambling. The terrain has good footing and plenty of holds to pull yourself up. The risk of a fall is very low. Class 1 routes may involve minor rock-hopping or short steps up to 4 feet (1.2 m) tall. No ropes or climbing protection are needed.
How to perform:
- Wear sturdy hiking shoes for ankle support
- Use trekking poles for stability on loose terrain
- Watch footing and use hands just for minor balance
- Take regular trails choosing the easiest lines
- Go slow on sections requiring minor boulder hopping
- Can be done by almost anyone with hiking experience
Class 2 Scrambling
Class 2 introduces light scrambling techniques, though hiking poles can still provide balance assistance. Look for ledges, cracks and blocks to use for handholds and footholds. The angle increases along with exposure, requiring basic climbing maneuvers like stemming, smearing and mantling. Rock steps range from 4 to 8 feet (1.2 – 2.4 m) high. Falls can occur but are not serious.
How to perform:
- Wear grippy climbing shoes for smearing and edging
- Face in towards the slope and use 3 points of contact
- Test each handhold before putting full weight on it
- Look ahead to plan the route up the gully
- Use holds strategically instead of pulling straight up
- Move deliberately and maintain secure foot placements
- Take rest breaks before getting pumped out
Class 3 Scrambling
This level requires using your hands most of the time. The rock may be steeper, looser and more uneven. Ledges give way to face climbing up rock bands. The exposure increases so a fall could lead to injury. Look for hand cracks and jam holds for grip. Front-pointing with your feet and palming the rock helps propel upwards. Routes have steps up to 12 feet (3.6 m) tall. No ropes are needed, but advanced skills and fitness are required.
How to perform:
- Bring grippy gloves for prolonged handholds
- Assess rock quality and avoid loose sections
- Move hands and feet sequentially; don’t span too wide
- High step to maximize reach between solid holds
- Feel for deep hand jams in cracks to grip and inch up
- Get Facing feet to push against the rock when chimneying
- Check footing and don’t rush complex sequences
- Stay aware of the terrain above to avoid dislodged rocks
Class 4 Scrambling
Class 4 scrambles are steep, exposed and may have sheer steps up to 15 feet (4.5 m) high. Look for chimneys, liebacks, and chockstones to help negotiate the technical crux sections. Advanced climbing techniques like arm bars, heel hooks and crimping come into play. The serious exposure means a rope may be recommended for safety, along with a climbing helmet. Excellent upper body power and foothold precision is key.
How to perform:
- Wear a climbing helmet for falling rock protection
- Look for ledges and edges across exposures to minimize fall potential
- Focus mentally and commit confidently to each move
- Smear shoes on friction slabs and trust technique
- Keep hips in and center of gravity close to the rock face
- Finduous cracks offer hand and foot jams for balance
- Move with precision and control. No rushed movements
- Consider setting temporary protection like slinged horns
Class 5 Scrambling
This type of “easy climbing” requires a rope, climbing protection and safety knowledge. While not as risky as lead climbing, Class 5 pitches have vertical, overhanging or traversing moves. Look for cracks and edges for fingertips rather than handholds. Liebacking, underclings and controlled dynos help traverse over roofs. Soloing Class 5 terrain quickly turns into lead climbing, requiring gear to safely ascend and control a fall.
The main keys are climbing within your ability, using proper technique, and staying focused and aware at all times. Don’t hesitate to back off if a section feels too challenging. Staying safe takes priority over reaching summits.
| Class | Description | Techniques Used | Gear Needed |
|---|---|---|---|
| 1 | Basic hiking with minor hand assistance | Minor boulder hopping | Hiking shoes, trekking poles |
| 2 | Light scrambling up to 40 degrees | Smearing, stemming, mantling | Climbing shoes recommended |
| 3 | Frequent hand use up to 50 degrees | Crack climbing, chimneying | Helmet, gloves recommended |
| 4 | Advanced scrambling verging on climbing | Slab friction, liebacks | Rope and protection recommended |
| 5 | Technical climbing requiring ropes | Crack systems, overhangs | Rope, hardware, climbing gear |
Rock Scrambling Skills: How To Start rock climb

Scrambling requires a new skillset beyond what most hikers possess. With the right instruction, anyone fit enough can learn safe scrambling techniques.
Ideally take a scrambling course to learn:
- Route finding
- Rock climbing techniques
- Safety procedures
You can also learn by going on easier scrambles with experienced leaders. Here are the key skills to start with:
Route Finding
The lack of trails makes choosing a safe route your top priority. Consider:
- Terrain: Assess slopes for stability and obstacles. Avoid loose rocks and cliffs.
- Difficulty: Pick a route well within your skill level. Turn back if it gets too advanced.
- Exposure: Minimize exposure to steep drop-offs as much as possible.
- Efficiency: Don’t make the route harder than needed. Stick to the easiest lines up.
- Hazards: Watch for rockfall and lightning risk. Choose the safest option.
- Bailout points: Scout potential exit points before committing to a slope.
Great route-finding means safely reaching the top and back down.
Rock Climbing Techniques
You’ll use basic rock climbing moves without ropes. Practice:
- Handholds: Grip rocks securely for balance. Test before weighting.
- Foot placement: Use edges and cracks for stable stands on rock. Smearing on slabs.
- Chimneying: Brace your body between rock walls to inch up chimneys.
- Friction slab climbing: Trust your sticky shoes smearing onto the low-angle rock.
A scrambling course or gym climbing builds climbing confidence.
Balance And Footwork
Good balance and footwork keeps you stable on loose terrain:
- Maintain three points of contact to stay balanced.
- Take deliberate steps and test footing before shifting weight.
- Use flat, supportive foot placements when possible.
- Move slowly with control. Backup holds as needed.
- Relax muscles so they can react and adjust naturally.
Practice climbing over boulders and rock piles to improve.
Situational Awareness
Stay alert to hazards and changes at all times:
- Check footing and handholds before committing weight.
- Notice crumbly rock, loose holds, weather changes, etc.
- Listen for rockfall and never climb directly below others.
- Be ready to turn around if conditions deteriorate.
- Stay aware of the terrain ahead and quick bailout options.
Continuously monitoring the environment prevents accidents.
Related Article:
Scrambling in Hiking Boots ─ Should you?

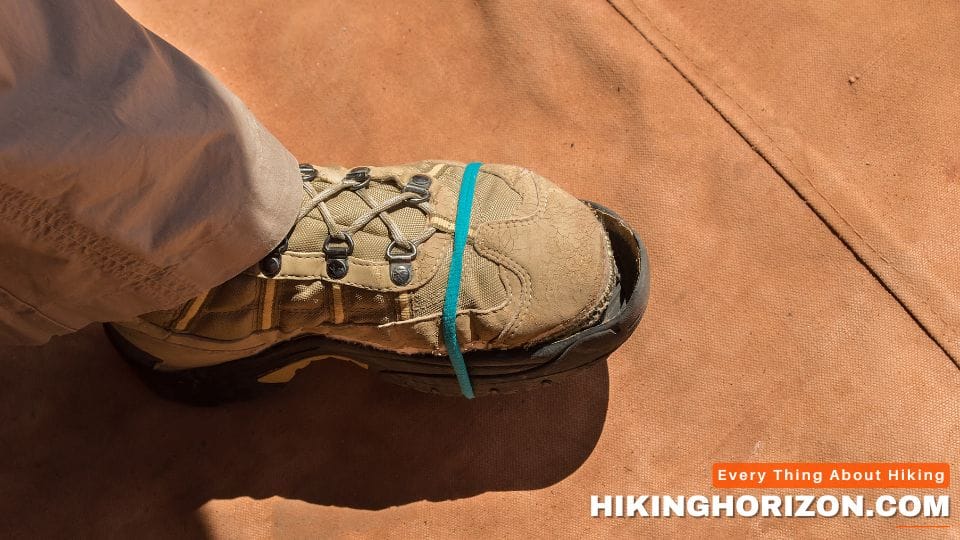
Hiking boots provide ankle support and rugged durability for the trail, but are they suitable for scrambling’s rock faces and ledges? The short answer is yes, but approach shoes or trail runners are better.
The stiff midsoles and heavy build of hiking boots limit sensitivity and precision on rock. The deep lugs catch on small footholds. While the ankle support aids stability on slopes, boots restrict ankle flexion needed to smear and edge smoothly.
However, for Class 1 and 2 scrambles, hiking boots are certainly doable. As the difficulty increases to Class 3, look into these compromises:
- Approach shoes: Light and flexible like trail runners but with sticky rubber soles for edging, and light padding to cushion landings. The close fit improves proprioception.
- Stiff trail runners: Not as bulky as boots but with protective upper material and responsive soles. Look for Vibram Megagrip or Stealth Rubber for grip.
- Light hikers: Mid versions trim heft while retaining support and tread. Examples like the La Sportiva Ultra Raptor strike a balance suitable for scrambling.
No matter what footwear you pick, add trekking poles for stability through loose terrain. On harder routes, you’ll likely need to stow them and use your hands.
Essential gear for Scrambling

Having proper gear makes scrambling much safer and more enjoyable. Don’t skimp on these essentials:
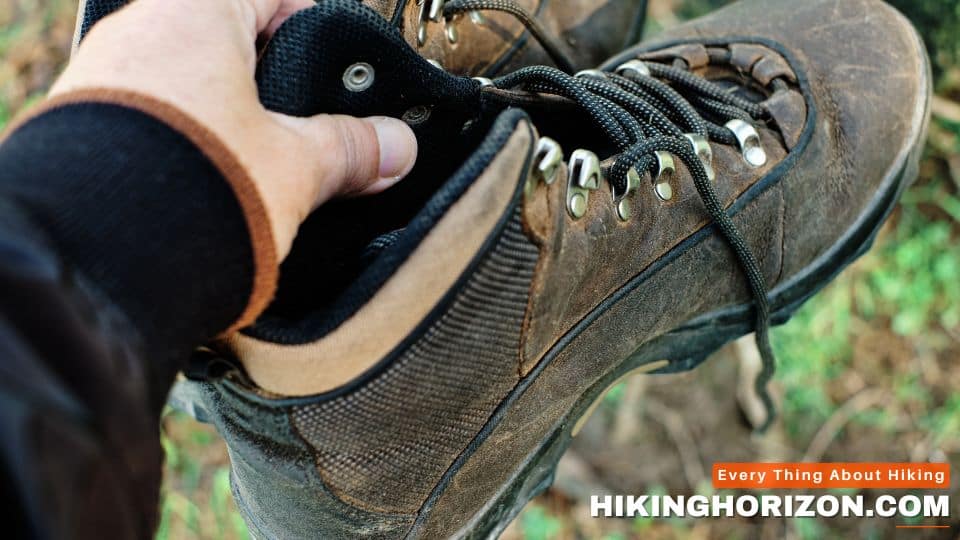
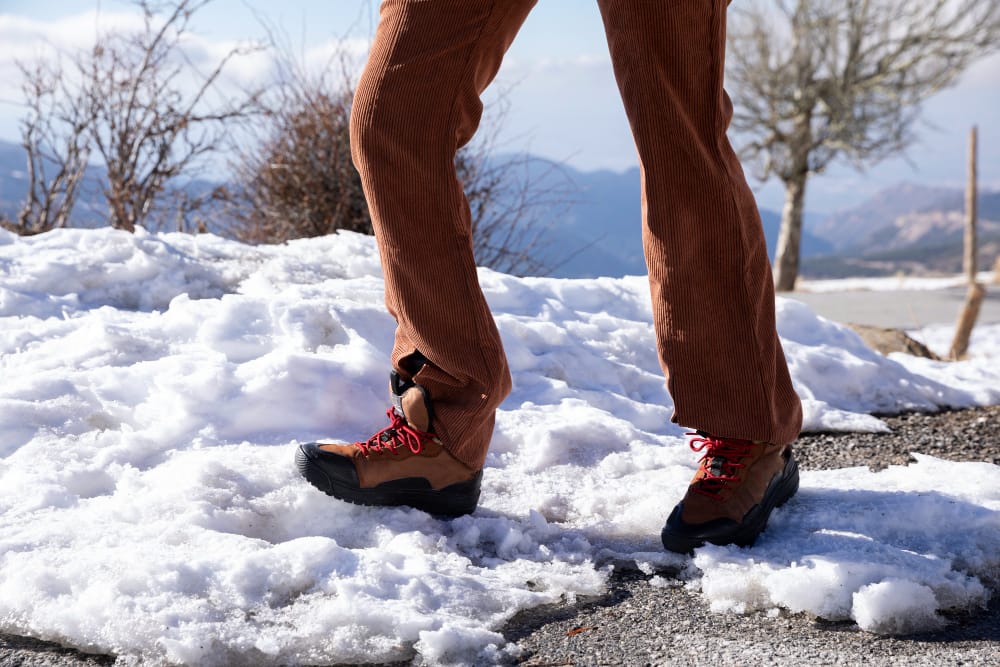
Sturdy Hiking Boots/Shoes
Lugged soles with stiff support provide traction on rock and protect ankles from rolling. Boots offer more stability for exposed scrambles.
Popular picks are approach shoes like the 5.10 Guide Tennie or serious boots like the La Sportiva Nucleo High.
Durable Pants
Lightweight softshell pants stand up to abrasion from rock without restricting movement. Avoid shorts or standard pants that tear easily.
Black Diamond Notion Pants are a top choice for flexibility and durability.
Grippy Gloves
Gloves protect your hands from sharp rocks. Models with rubbery dots provide a grip for handling holds.
Sealskinz All Weather Gloves are perfect for scrambling grip and all-day comfort.
Collapsible Trekking Poles
Poles provide stability on loose terrain and distribute load on knees during descents. Get collapsible ones that attach to your pack.
Black Diamond Distance Carbon cork poles are super lightweight yet durable.
Climbing Helmet
Wear a helmet whenever a rockfall hazard exists or you’ll be under overhangs. The Petzl Meteor III is lightweight and highly adjustable.
First Aid Kit
Bring a basic kit, including bandages, gauze, medical tape, antiseptic wipes, and painkillers. Add an emergency blanket, whistle, and signal mirror if solo.
Adventure Medical Kits Mountain Backpacker Kit covers essentials.
Related articles:
| Gear | Purpose | Examples |
|---|---|---|
| Sturdy shoes/boots | Ankle support, traction on rock | Approach shoes, light hikers |
| Trekking poles | Balance on loose terrain | Black Diamond collapsible poles |
| Softshell pants | Abrasion resistance | Black Diamond Notion pants |
| Gloves | Grip, hand protection | Sealskinz All Weather gloves |
| Helmet | Falling rock protection | Petzl Meteor III |
| First aid kit | Wound care, medications | Adventure Medical backpack kit |
scrambling Safety: How To Scramble Responsibly

With the proper precautions, scrambling doesn’t have to be high risk. Follow these tips to minimize objective hazards:
Pick Conservative Routes
Stick to slopes you’re 100% confident you can negotiate safely. Avoid anything that gives you pause or requires true climbing moves.
Scrambling is about adventure, not pushing your limits. Build experience gradually on easier routes first.
Check Conditions
Don’t attempt scrambles in poor visibility, high winds, rain or snow. Optimal conditions mean a dry, grippy rock surface.
Monitor the forecast closely in the days preceding your trip. Be ready to postpone if conditions deteriorate.
Go With Others
Solo scrambling, especially when starting out, is extremely unwise. Adding even one partner cuts risk substantially.
More people means you can spot each other on exposed sections, get help if injured, and avoid fatal errors.
Wear A Helmet
A climbing helmet protects your head from falling rocks kicked off from above. Wear one whenever a rockfall hazard exists.
Even small rocks can injure or kill if they hit you in the head. Better safe than sorry.
Know Your Limits
Accidents happen when scramblers overestimate their abilities. Stick to easier routes until you have years of experience.
Don’t let summit fever cloud your judgment. Be ready to turn around if a route gets sketchy. The mountain will still be there later.
Common Scrambling Mistakes (And How To Avoid Them)
It’s easy for inexperienced scramblers to make dangerous mistakes. Here are the most common ones and how to stay out of trouble:
Attempting An Advanced Route
Eagerness to reach a summit leads some scramblers to try routes beyond their skill level and get stuck. Always pick routes well below your known ability.
If you find yourself nervous halfway up a slope, that’s your cue to turn around. Descend safely and try a less challenging line another day.
Climbing Solo
Solo scrambling leaves zero margin for error. With no one to spot you or call for help, one slip could be fatal. Recruit at least one partner, preferably two or more.
Join scrambling meetup groups to find partners. Or take guided trips when starting out.
Moving Too Fast
Rushing leads to slips and falls. Slow down and move deliberately. Test each handhold and foothold before committing weight.
Moving fast forces you to focus on speed rather than safety. Take your time and enjoy the process.
Skipping Gear
Omitting key gear like helmets and gloves means you won’t be prepared if you fall or get hit by rockfall. Bring every recommended safety item.
Gear may seem unnecessary until the moment you actually need it. You’ll be glad you brought it!
Climbing When Wet
Rain, snow and ice increase your chances of slipping and falling. Wait for dry conditions before scrambling.
If caught in precipitation on a route, descend immediately. The summit view isn’t worth a broken bone or worse.
Finding Amazing Scrambling Routes
Okay, you’ve got the gear, skills and safety mindset. Now it’s time to discover amazing scrambles! Here are the best resources for finding prime routes:
- Guidebooks: Get local scrambling guidebooks covering routes in your area. These offer route descriptions, difficulty ratings, maps and photos.
- Gaia GPS app: Download maps to view terrain and marker user-submitted scrambles. Great for scouting possible routes.
- Peakbagger website: Browse route descriptions submitted by members for peaks across North America and the world.
- Local climbing groups: Connect on forums and social media with local climbers and ask for scrambling beta.
- Park rangers: Chat with rangers at national and provincial parks to hear about lesser-known scrambles on their lands.
- Topographic maps: Study maps to look for short routes between hikeable terrain and summits.
Do your research ahead of time to discover amazing scrambles. Then get out there, trust your skills, and enjoy the views you’ve earned!
7 Scrambling Tips For Beginners while hiking and rock climbing

If you’re new to exploring off-trail and climbing up rock bands, keep these safety tips in mind on your first scrambles:
1. Buy Grippy Gloves
Scraping your hands on sharp holds ruins the fun real quick. A pair of gripping gloves protect your skin and also improves your hold on slippery rock.
Look for gloves with leather palms for durability and rubberized fingertips for grip. Partial finger coverage enhances dexterity. Bring an extra pair in case the first gets wet.
2. Practice Rock Climbing First
Even Class 2 scrambles involve basic climbing techniques. Take a beginner lead climbing or bouldering class to learn skills like:
- Smearing your feet on slabs
- Mantling over rock lips
- Stemming between vertical cracks
- Palming and friction slab climbing
This makes moderate scrambling much less daunting. Having a foundation in climbing movement helps immensely.
3. Avoid Vegetation as Handholds
It may seem tempting to grab tree branches and shrubs when ascending, but vegetation breaks and rips easily. Stick to rock holds for reliable, injury-free scrambling.
Thick grass and moss also disguise holes and trip hazards. Use solid rock steps and traditional climbing holds whenever possible.
4. Always Maintain Three Points of Contact
On any exposed class 3+ scrambling terrain, strive to keep at least three limbs in contact at a time. This could mean two feet and one hand planted as you reach for the next hold. Or two hands with one foot weighted as you step up.
More points of contact provide greater stability if one slips. Never move both feet at the same time during an exposed traverse. Practice smooth, controlled transitions between holds.
5. Test Your Footholds and Handholds
Thoroughly inspect and lightly weigh any hold before committing your full weight to it. Give it a tug or tap to confirm it won’t break or pull off.
Pay special attention to surface texture – flaky or mossy rock offers poor friction for footholds and handholds. Look for textured, clean rock with positive edges to grip securely.
6. Take Your Time
This isn’t a trail run. Rushing leads to slips and grabs. Slow down and focus on precise footwork and hand movements. Take time to assess your line and weigh new holds gradually.
If you feel rushed by others, let them pass when space allows. Making a mistake on exposed terrain can be disastrous, so move at your own safe speed.
7. Prepare Like You Would A Hike
Just because it’s not a groomed trail doesn’t mean you can wing it. Prepare for a scrambling outing like you would a hardcore hike:
- Pack essential safety gear including first aid kit, headlamp, emergency blanket and whistle.
- Check the weather forecast and prepare for quick changes in alpine zones.
- Know your limits and don’t push too far into difficult, un-scouted terrain.
- Tell someone your plans and expected return time.
- Bring enough food, water, layers and phone battery to handle getting lost and spending a night out if required.
With the right preparation and training, scrambling offers a whole new way to ascend mountains and ridges. But ease into it gradually, without compromising safety. The rock isn’t going anywhere – build your skills systematically.
| Tip | Details |
|---|---|
| Buy grippy gloves | Protect hands and improve grip on rock holds. Leather palms and rubberized fingers. |
| Take a climbing course | Learn essential skills like smearing, stemming, mantling. Build confidence. |
| Avoid vegetation holds | Branches and shrubs break easily. Use rock holds only. |
| Maintain 3 points of contact | Keeps stable on exposure. Transition smoothly between holds. |
| Test foot and handholds | Inspect first, don’t trust right away. Confirm solidness. |
| Take your time | Rushing leads to slips and falls. Move slowly and deliberately. |
| Prepare like a hike | Pack safety essentials, check weather, know your limits. |
FAQs
What does scrambling mean in climbing?
Scrambling is a form of hiking that requires the use of both your hands and feet to climb up rocky terrain and ridges. It’s considered the middle ground between hiking and rock climbing. A hiker’s guide to scrambling covers the techniques and gear needed for this activity that falls between hiking and climbing on the Yosemite Decimal System scale.
What is considered scrambling?
Scrambling takes place off-trail and often requires the use of your hands to climb up rocky slopes and ridges. It’s a step up from hiking but doesn’t quite classify as technical rock climbing. Many scrambling routes are graded on a scale from 1 to 3, with grade 1 scrambles requiring occasional use of hands and grade 3 scrambles needing rope and safety equipment.
How can I improve my scrambling?
To improve at scrambling, practice using both your hands and feet on boulders and lower rock faces. Work on your balance, comfort with heights, and grip strength. Take a climbing or scrambling course to learn techniques like chimney climbing or the hiker’s shuffle from an experienced guide. The more scrambling experience you gain, the more comfortable you’ll become.
What is the purpose of scrambling?
The main purpose of scrambling is to reach mountain summits and ridges by the easiest non-technical route. It allows hikers to access more challenging terrain than standard hiking trails while using hands and body positioning rather than ropes and climbing gear. Scrambling is a great way for hikers to improve balance and skills on rock and test their heads for heights.
What is a Class 2 scramble in hiking?
A Class 2 scramble is rated as simple scrambling that requires occasional use of the hands for balance. This grade of scrambling is considered relatively safe for most hikers with a good head for heights. Class 2 doesn’t require ropes or technical climbing skills. However, a hike may have extended Class 2 scrambling, which can be strenuous and exposed.
How do you scramble safely?
When scrambling, it’s important to check weather and trail conditions, wear proper footwear, and bring essential safety gear. Don’t scramble alone and scope out handholds before using them. Use caution on wet or slippery rocks. Focus on balance and controlled movements. The safer you scramble, the more you’ll enjoy the experience and the views.
What is the difference between scrambling and bouldering?
The main difference is that scrambling involves climbing up ridges and mountainsides using natural hand and footholds, while bouldering consists of climbing on small rock walls and boulders, rarely more than 20 feet tall. Bouldering problems are condensed and technical. Scrambling covers larger, more open terrain and is part of ascending a peak.
What are the two common scrambling techniques?
Two main scrambling techniques are chimney climbing, which uses opposing walls for support, and the hiker’s shuffle, which involves balanced, controlled lunging movements. Both require good footwork and flexibility. Other useful techniques include stemming, smearing, traversing, and using fingerholds for pull-ups. An experienced mountain guide can teach proper scrambling techniques.
How do you start scrambling?
As a beginner, look for grade 1 scrambles to start out. Use hiking poles for balance and wear shoes with good grip. Move slowly and test handholds and footing before committing weight. Maintain three points of contact. Work on balance and footwork before progressing to more difficult, exposed routes. Gain experience and get comfortable with easier scrambling before moving on to advanced techniques.
Do you need ropes for scrambling?
Ropes are not usually required for basic scrambling but can provide security on exposed advanced routes. On something classified as a Class 3 scramble with increased risk, experienced scramblers may choose to bring a rope and climbing gear for safety. If you’re new to scrambling, stick to more simple Class 1 and 2 routes to develop skills and confidence first.
Reward Yourself With Breathtaking Summits
As much effort as scrambling takes, the rewards at the top make it all worthwhile. Reaching a summit after a thrilling off-trail ascent fills you with incredible satisfaction. You gaze out, taking in panoramic views that most people will never enjoy. Your nerves settle as you refuel, hydrate, and soak up the scenic serenity you worked hard to reach. It’s a special feeling that only venturing into the vertical unknown can provide.
Those moments don’t come easily. But with the right skills, preparation, and judgment, you can experience them safely.
Scrambling lets us access the magic of high places in pure, unadulterated form. You forge your own path up the mountain on its natural terms. Scramble because you crave adventure. Scramble because iconic summit views call your name. But most of all, scramble because it connects your human spirit to the wilderness in a profound way.
Just remember to build your skills gradually, go with trusted partners, and always put safety first. The mountains will be waiting. Enjoy the rewarding journey upward.

MARK RODRIGUEZ
Mark is an experienced backpacker who has completed several multi-day hikes, including the John Muir and Wonderland Trail. He is also a hobbyist photographer who delights in capturing the captivating essence of nature through his camera lens. Mark is passionate about environmental conservation and often volunteers for trail maintenance and clean-up projects.

I really like reading through a post that can make men and women think. Also, thank you for allowing me to comment!
Wow, this blogger is seriously impressive!
I appreciate you sharing this blog post. Thanks Again. Cool.
I enjoyed learning the distinction between hiking and using hands or gear to ascend near-vertical sections known as scrambling. The stunning scenery photos captured my sense of adventure. This article provides helpful context around evaluating my limits and risk factors before attempting such challenging terrain.
Thank you robert!
I always try to share my knowldge to benefit my readers.
Thanks to the high-quality content and the administrator’s active involvement, the site’s reputation will undoubtedly improve soon.
Wow, this post on scrambling in hiking is incredibly informative! I never knew the difference between hiking and scrambling until now. It’s inspiring me to try something new and challenge myself on the trails.
Wow, this was a comprehensive article, Mark. Great information.
Cheers,
Doug Smith
Thanks Doug! I’m glad you found the article helpful and thorough.
For thrill-seeking hikers, scrambling pushes physical limits while etching epic memories. As this piece explores, traversing steep, rocky terrain with hands as well as feet quickens the pulse and sharpens every sense. The adrenaline rush of an exposed cliffside traverse or a last push up a craggy summit remains long after the boots come off. Yet scramblers also relish the camaraderie forged while spotting their partners on precarious pitches.
Mastering more technical trails builds confidence to venture onto more audacious landscapes. Scrambling challenges us to be present and nimble – invaluable skills on and off the mountain. With added risk comes rewards that remind us what it means to feel alive.
It was great seeing how much work you put into it. The pictures are nice, and your writing style is stylish. I’ll almost certainly be back to read more of your work. Keep sharinf your valuable experinces here.
Wow, what an exhilarating read! As an avid hiker, I’ve always been drawn to the thrill of venturing off-trail and scrambling up rocky slopes. This comprehensive guide on scrambling in hiking has provided me with invaluable techniques, safety tips, and a deep understanding of the rewards that await those who embrace this unique adventure. The breathtaking views, the physical and mental challenges, and the sense of accomplishment are truly unmatched. I can’t wait to plan my next scrambling route and embark on a journey that will take my hiking experience to new heights!
The detailed explanations of scrambling techniques, safety tips, and the rewards of reaching unique summits have left me inspired and eager to explore off-trail terrains. This comprehensive article has provided me with the essential knowledge to embark on safe and thrilling scrambling adventures.
Thank you, the authors of Hiking Horizon, for this fabulous resource that will undoubtedly enhance my hiking experiences!