
Using a compass is an essential skill for any hiker venturing into the wilderness. Knowing how to use a compass while hiking allows you to navigate unfamiliar terrain, avoid getting lost, and find your way back to civilization if needed.
In this complete guide, you’ll learn everything you need to know about using a compass while hiking. We’ll cover how to read a compass, take bearings, adjust for declination, orient a map, and step-by-step instructions for navigating with a map and compass.
Whether you’re a total beginner or looking to brush up on your navigation skills, this guide has you covered. Let’s get started!
Table of Contents
Types of Compasses for Hiking
There are several types of compasses to choose from. Here are the most common:
- Baseplate compass – The most popular for hiking. Sturdy and lightweight with a clear rectangular baseplate for map navigation.
- Button compass – Smaller and easier to carry. No baseplate, so there is limited map use.
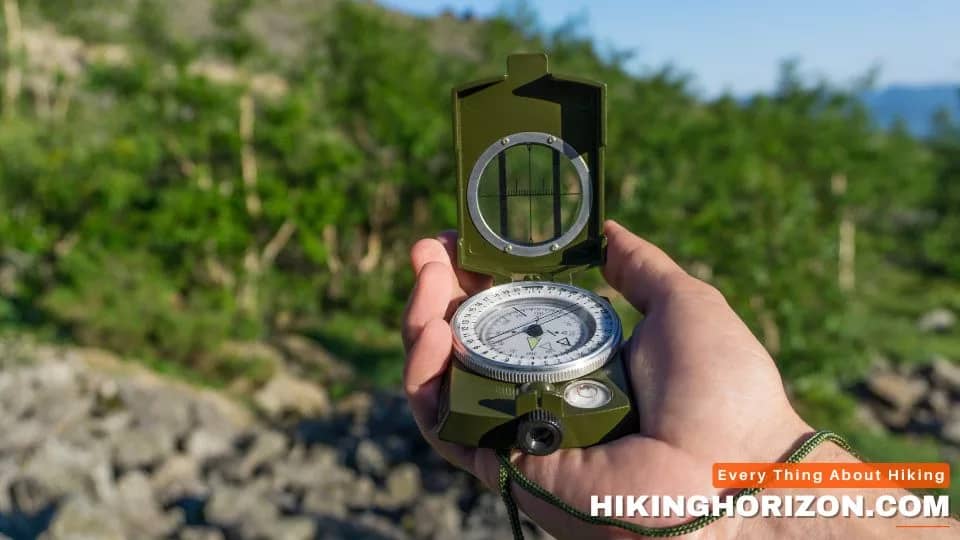
- Lensatic compass – Military style with a sighting lens. Useful for taking more precise bearings. Overkill for most hikers.
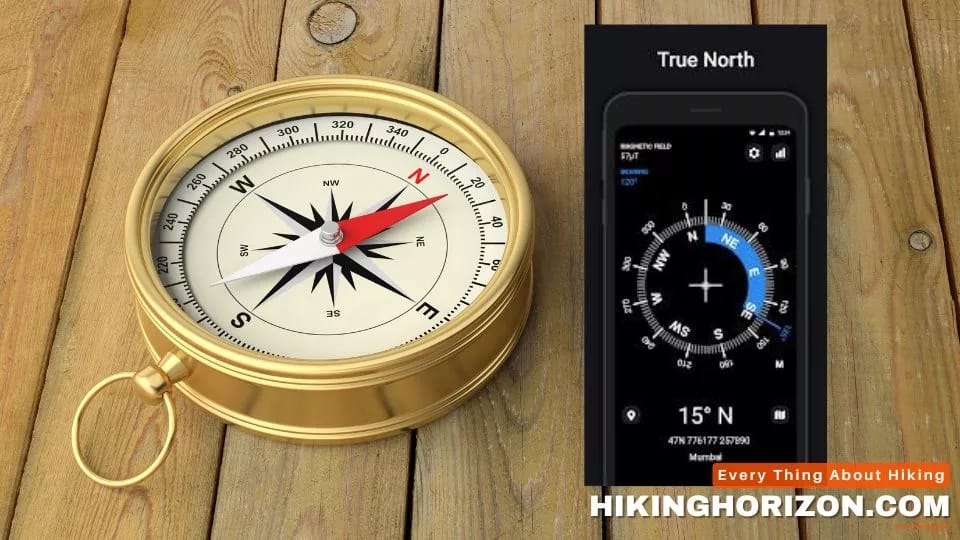
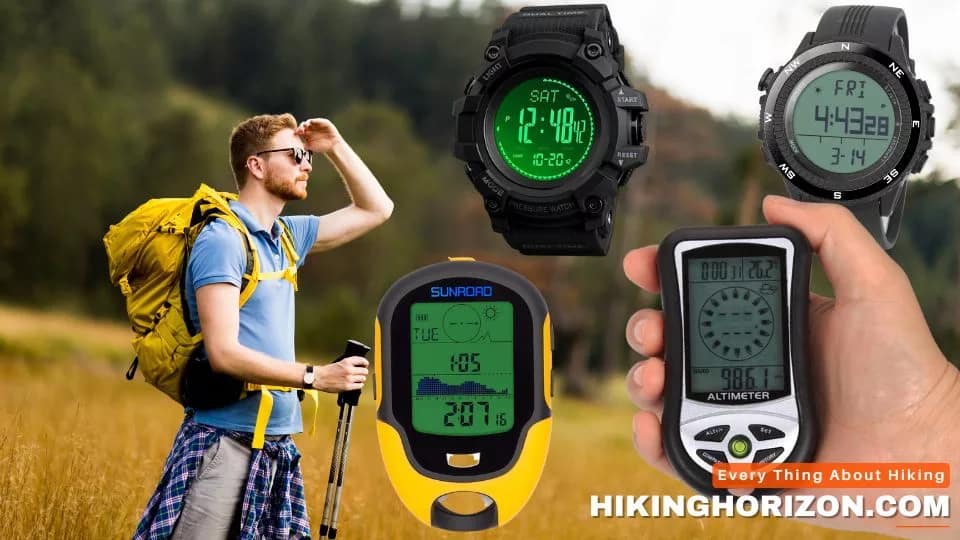
- Digital compass – Built-in electronic compass in smartwatches and GPS devices. Convenient but less reliable. Bring a backup analog compass.
For hiking, we recommend choosing a baseplate compass. The integrated rectangular base makes map navigation much easier compared to a small button compass. It’s also more durable than a lensatic compass.
Related Article: Top 10 Best Compasses for Hiking Beginners in 2023 – Find your way Effortlessly
Understanding the Key Parts of a Compass

To successfully navigate with a compass while hiking, you need to understand the function of each component. The main parts include:
Baseplate
The baseplate is the clear plastic rectangular base that sits on top of your map as you navigate. When taking a bearing, you’ll place the edge of your compass along the line on the map between your start point and destination. Rotate the compass housing so that the orienting arrow lines up with the map’s grid lines.
Magnetic Needle
The magnetic needle is the red end that points towards the magnetic north. When you hold your compass flat, this red end will rotate and settle on magnetic north. The key with a compass is that magnetic north is different than true north, which is why you must orient your map and adjust for declination.
Orienting Arrow
The orienting arrow outlined in red sits under the rotating bezel. It is a key part of orienting your topo map. Simply rotate the bezel until the orienting arrow lines up with the orienting lines on your map that point to true north. Now, the map’s directions match the terrain.
rotating bezel
The rotating bezel is the movable dial that turns and allows you to set your bearing direction. The degree markings align with the index line on the base. You’ll use this bezel to take bearings on the map.
Direction of Travel Arrow
The direction of the travel arrow, usually outlined in red, sits on the baseplate and indicates the direction you want to walk when following a bearing. It is essentially the course line on your map.
Straight Line
The sighting line is used to aim at landmarks by peering through the compass and lining the landmark up with the sighting lines. It allows you to stay on course when following your bearing.
Learning how these key parts interact is essential for accurate wilderness navigation. With your compass in hand and a detailed topo map, you’ll be equipped to navigate wherever your hiking takes you.
Related Article: How Do You Know Your Compass is Accurate? 19 ways to check!
Taking a bearing allows you to determine a direction of travel or the direction from your current location to a landmark. Here is the process:
- Place the compass flat on the map. Ensure the edge lines up with your location and landmark.
- Rotate the bezel so the orienting arrow lines up with the north-south grid lines.
- Read the bearing at the index line where the edge of the compass meets the landmark.
- Follow the direction of the travel arrow on the baseplate to move in that direction.
- Use a bezel and sighting line to aim at landmarks when moving.
Tip: You can also take a bearing in the field without a map by aligning north and sighting landmarks.
Taking accurate compass bearings is a fundamental skill for wilderness navigation. With practice, you can take quick bearings to guide your route on any hike.
How to Take Bearings in the Field
Taking an accurate bearing with your compass is a key wilderness navigation skill. Here is a step-by-step guide on how to take a bearing in the field:
First, learn how to use your compass by understanding its parts. When you hold the compass flat, the magnetic needle end will point toward the magnetic north. Rotate the bezel so the orienting arrow lines up with the north-south orienting lines.
To take a field bearing:
- Stand at your start location on the map, holding your compass flat in your hand. Rotate your body until the red end of the magnetic needle lines up with the N marked on the bezel.
- Sight along the direction of the travel arrow on the baseplate, lining it up with a landmark in front of you. Peer through the sighting lines on the compass as you do this.
- Check the degree markings along the rotating bezel where the index line meets the baseplate. It is your bearing in degrees from your start point to the landmark.
- Adjust this bearing to account for declination. If the topo map notes a 15° E magnetic declination, add this amount to get your true bearing.
- Continue aiming at landmarks using your sighting line while following the bearing direction. Recheck frequently.
You can quickly take accurate bearings with your compass on any hiking trail with practice. Learning basic navigation skills with this essential tool will give you more flexibility when you’re out on the trail.

Another key concept in compass use is declination. Declination is the difference between true north and magnetic north. Due to Earth’s magnetic field shifts, the magnetic north moves slightly each year.
Mapmakers account for this by marking declination on each map in the legend. When navigating, you must adjust your compass bearing to match the map’s declination.
Here is how to adjust for declination when taking a bearing:
- Note declination on map legend (e.g., 15° E).
- Take compass bearing as usual.
- If east declination, add degrees to the bearing.
- If west, subtract degrees. Adjust the rotating bezel to match.
- The compass now matches the true north bearings on the map.
Doing this simple calculation each time ensures your compass bearing matches the map. After a few times, adjusting for declination becomes second nature.

Whenever you pull out your map and compass in the field, the first step is to orient the map. It involves lining up the map’s north arrow with true north using your compass.
Here is the process to orient your map:
- Put a compass on the map. Place near map center with edge parallel to north-south grid lines.
- Rotate the compass housing so the red end of the needle points to N on the compass housing.
- Rotate the entire map until the red end of the needle aligns with the map’s north arrow.
- The map is now oriented! The map’s directions now match the terrain and compass.
Orienting properly ensures the map’s directions correspond to reality. Otherwise, you could end up going the wrong way! Take a few seconds whenever you use your map and compass together to orient first.
How to Navigate with Map and Compass

Now that you understand the basics of compass use let’s go over step-by-step navigation instructions. It builds on previous sections, so be sure to read through from the beginning.
Choose Landmarks Along the Route
- Study your route on the map and choose visible landmarks – boulders, streams, trail junctions, etc. You’ll aim for these when navigating.
Take Bearings Along the Route
- Take a bearing from your start point to the first landmark. Adjust for declination.
- Repeat for bearings to each subsequent landmark until the end. Record these bearings.
Orient Map at Start Point
- Reach the start point and orient the map with the compass using the technique above.
Follow Bearings and Reset
- Hold compass flat in hand. Rotate your body until the compass aligns with the first bearing. It is your direction of travel.
- Pick a landmark in that direction and walk towards it using a compass and sight line to stay on bearing.
- Upon reaching the landmark, reorient the map and take the bearing to the next landmark. Repeat.
Use Pace Counting
- Use pace counting to estimate the distance traveled. It helps identify when you should hit landmarks.
- If you walk off bearing, return to the last known point and reconnect with the route.
Following this systematic approach using landmarks, bearings, and pace counting allows you to precisely navigate wilderness off-trail. It’s a good idea to practice these techniques on a few shorter hikes before trying a longer backcountry trip.
Related Article: How to find direction without a compass? 11 Clever Ways You Should Know!
Finding Your Bearing When Lost ─ how to read a map

When you are out hiking on a trail, it is important to be able to navigate in case you get lost. One of the best navigation tools to have with you is a compass. Here is a step-by-step guide on how to use a compass to find your bearing and orientation when you are lost on a hike:
- Take your compass out. Remove your compass from your pack or pocket. Make sure it is a good-quality compass with detailed degree markings. Place the compass flat in your hand, away from any metal objects that could affect the magnetic needle.
- Orient the compass to the map. Place the compass flat on top of the hiking map you have with you. Rotate the map and compass together until the orienting lines on the compass match up with the north-south grid lines on the map. It aligns the compass with the map’s orientation.
- Find your location on the map. While keeping the map and compass oriented together, look at the map to find your approximate location along the trail you were hiking. Identify landmarks, if possible, to narrow down your location.
- Find north on the map. Look at the top of the map to locate which direction is north. Turn the compass on the map so that the N marker for north on the compass dial aligns with the north direction on the map.
- Read the bearing. With the north of the compass aligned to the north on the map, read the number on the compass dial at the index line where the orienting arrow is pointing. It is your bearing in degrees from north.
- Follow the bearing. Turn your body until the compass needle lines up with the bearing number you read on the dial. The arrow end of the needle will point away from you in the direction you need to go to get back on track. Pick a landmark in that direction and walk towards it.
- Recheck frequently. Recheck your compass bearing and map orientation frequently as you walk to ensure you stay on track. Make adjustments to your direction as needed.
Using a compass properly along with a map is one of the best ways to orient yourself when lost hiking. With some practice, a compass can be an invaluable navigation tool to get you safely back on track.
Tips for Successful Map and Compass Navigation
Here are some additional tips to help you navigate efficiently with your map and compass:
- Orient your map frequently using the compass. It’s easy for the map to shift.
- Take notes on bearings and landmarks. Don’t rely solely on memory.
- Use pacing to estimate the distance covered. It makes navigation more precise.
- Consider building small cairns at key points to clearly mark your route.
- If conditions are challenging, take more frequent bearings rather than fewer long ones.
- Stay calm if you feel lost. Stop, orient your map, relocate your position, and get back on route.
- Bring extra batteries! A compass does no good when the needle won’t settle.
- Practice navigation skills on each hike to build experience and confidence.
Following these tips and instructions will set you up for safe and enjoyable off-trail hiking using your map and compass.
Common Compass and Map Navigation Mistakes

Navigation mistakes can happen even to experienced hikers. It is important to be aware of common errors so that you can avoid making them.
- Forgetting to adjust the compass for declination. It leads to traveling in the wrong direction right away.
- Not properly orienting the map with the compass. Causes map directions to be incorrect.
- Inaccurate bearings due to sloppiness or magnetic interference. Double-check for accuracy.
- Overreliance on pace counting. Use pacing as a guide, but periodically confirm with a map and compass.
- Failure to recalibrate during rest breaks or after going off route. Disorients the map.
- Trying to take one huge bearing to the final destination. Break it down into smaller segments.
- Panicking when off route. Stay calm, get your bearings, consult the map, and get back on track.
Making mistakes is part of the learning process. The key is catching them early before you become completely lost. Frequent map checks using the techniques above will keep you oriented.
When to Rely on Map and Compass Over Trails
While trails provide reassurance, you don’t have to limit your hiking to them. Here are good times to go off-trail using your map and compass:
- Shortcutting between trail junctions or looping back to trails.
- Accessing lakes, peaks, and other areas not near maintained trails.
- Exploring rarely visited wilderness areas.
- When trails are poorly marked, overgrown, or otherwise hard to follow.
- In open areas like meadows or tundra, trails aren’t always necessary.
- Bad weather when trails are obscured. A map and compass allow you to get back safely.
As your navigation skills improve, you can be more creative using the map and compass to explore beyond the confines of trails. Just be sure to pay close attention and leave a wide safety margin.
How to Use a Compass While Hiking?
Frequently Asked Questions (FAQs)
Q: What is the purpose of using a compass while hiking?
A: The purpose of using a compass while hiking is to help you navigate and find your way. It allows you to determine the direction you need to go in order to reach your destination accurately.
Q: How does a compass work?
A: A compass works based on the Earth’s magnetic field. It contains a magnetic needle that aligns itself with the Earth’s magnetic field, with one end pointing towards the magnetic north pole. By aligning the compass needle with the markings on the compass dial, you can determine your direction of travel.
Q: How do I use a compass to navigate using a map?
A: To navigate using a map and compass, you need to align the map with the compass. Place the compass on the map in such a way that the straight edge of the compass aligns with the desired direction of travel. Rotate the map until the compass needle aligns with the orienting lines. It will ensure that the map is oriented correctly and you can follow your intended route.
Q: How do I take a bearing with a compass?
A: To take a bearing with a compass, you need to hold the compass level and away from any metal objects that may interfere with its accuracy. Then, point the direction-of-travel arrow on the compass towards your intended destination and rotate the compass bezel until the orienting lines match the direction-of-travel arrow. Finally, read the bearing from the degree markings on the bezel.
Q: How do I use a compass to follow a bearing?
A: To follow a bearing with a compass, set your compass to the desired bearing by aligning the direction-of-travel arrow with the degree markings on the bezel. Then, hold the compass level and make sure the arrow is pointing away from you. Turn your body until the compass needle aligns with the orienting arrow, and you can simply walk in the direction that the arrow is pointing.
Q: Can I use a compass in conjunction with a GPS?
A: Yes, you can use a compass with a GPS. While a GPS provides accurate positioning information, a compass can be used to confirm and cross-reference directions. It’s wise to carry a backup navigation method for hiking, and a compass is a reliable option.
Q: How do I adjust for declination when using a compass?
A: To adjust for declination when using a compass, you need to know the declination value for your location. Declination refers to the angular deviation between magnetic north and true north. To compensate, you can either add or subtract the declination value from your compass readings depending on whether you are east or west of true north.
Q: Are there any techniques for using a compass while trail hiking?
A: Yes, there are techniques for using a compass while trail hiking. One common technique is taking compass bearings at various checkpoints along the trail to ensure you stay on course. You can also use landmarks or natural features to verify your direction on the map or by sight.
Q: How do I take a back bearing with a compass?
A: To take a back bearing with a compass, you need to turn around and face the opposite direction from where you want to go. Hold the compass level and place the straight edge along the line you just traveled. Then, rotate the compass dial until the orienting arrow is pointing in the same direction as the compass needle. The number on the degree scale opposite the direction-of-travel arrow is your back bearing.
Q: What is the most important thing to remember when using a compass for navigation?
A: The most important thing to remember when using a compass for navigation is to ensure the compass is properly calibrated and the map and compass are aligned correctly. Without accurate alignment, your navigation could be off, leading to incorrect directions and potentially getting lost. Always double-check your compass readings and adjust accordingly before setting off on your hike.
Conclusion ─ how to use a compass & follow a bearing
Learning to use a map and compass opens up vast hiking opportunities you won’t get by relying on trails alone. With the ability to set bearings, orient maps, adjust for declination, and other techniques, you can navigate wilderness terrain safely and efficiently.
Start practicing your map and compass skills on lower-risk hikes before venturing further into the backcountry. And always carry backup navigation aids like GPS and PLBs on longer trips. But armed with the knowledge above, you’ll gain confidence in navigating using this time-tested tool.
Your compass enables freedom. Paired with a detailed topographic map, your hiking possibilities are vastly expanded. So grab your compass, pick a direction, and start your next hiking adventure!

John Smith
John has been an avid hiker for over ten years and has explored some of the most challenging trails across the USA. He has completed multiple long-distance hikes, including the Appalachian and Pacific Crest Trails. John is also a certified hiking guide, leading several hiking trips for groups of all ages and skill levels.

Great information shared.. really enjoyed reading this post thank you author for sharing this post .. appreciated
This was beautiful Admin. Thank you for your reflections.