Heading out on a hiking trip can be an exciting adventure into the great outdoors. But without the proper navigation tools, getting turned around on the trail is easy. A magnetic compass is an essential piece of gear for hikers to help maintain their bearing and stay on course. However, the accuracy of a compass can be affected by external magnetic forces. That’s why properly calibrating your compass is critical for backcountry travel.
This guide will cover everything you need to know how to calibrate a magnetic compass for hiking adventures. You’ll learn how to find your declination angle, adjust for true north, and field test your adjusted compass. Following proper calibration protocols helps guarantee precise readings for navigating cross-country hikes. Read on to master compass calibration and stay found on your wilderness adventures.
Table of Contents
Understanding Magnetic Declination

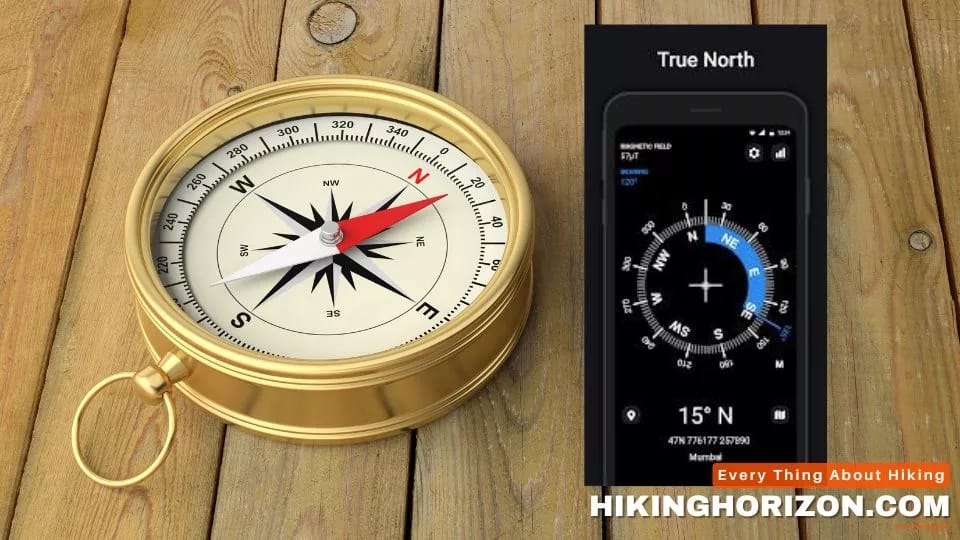
The needle of a magnetic compass always points towards magnetic north, which is not the same as true geographic north. This difference between magnetic and true north is called magnetic declination. It stems from the magnetic north pole being located approximately 1000 miles from the actual North Pole.
The distance and direction of this variance change depending on your location’s latitude and proximity to the magnetic pole. Magnetic and true north align in certain areas, while in other regions, the declination value can exceed 30 degrees.
To properly calibrate a compass, you must account for your local magnetic declination by adjusting the compass’s indicator. This ensures the compass’s needle is pointing to true north rather than solely magnetic north.
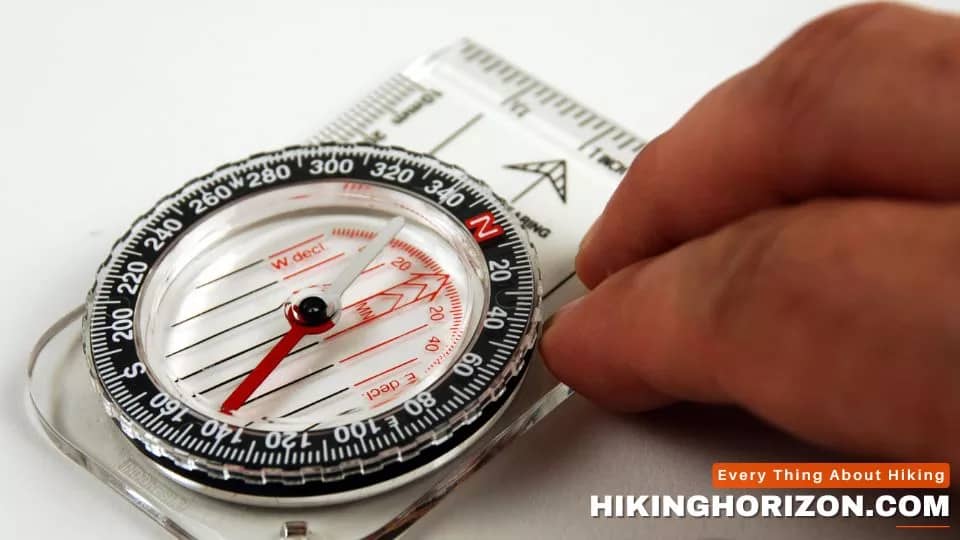
Before any outdoor activities involving navigation, take a moment to place your compass on a map featuring both magnetic and true north. Dial in the proper declination angle for your location along the compass’s adjustment indicator.
The exact declination value will vary based on your location’s unique position relative to the magnetic pole. Make sure to reference an up-to-date declination map before long hikes where you’ll heavily rely on the compass.
Understanding magnetic declination is a key compass 101 concept. Always factor in your location’s declination before diving into the wild fully reliant on a compass. Doing so provides the most accurate readings and avoids disorientation when electronic devices or metal objects cause interference.
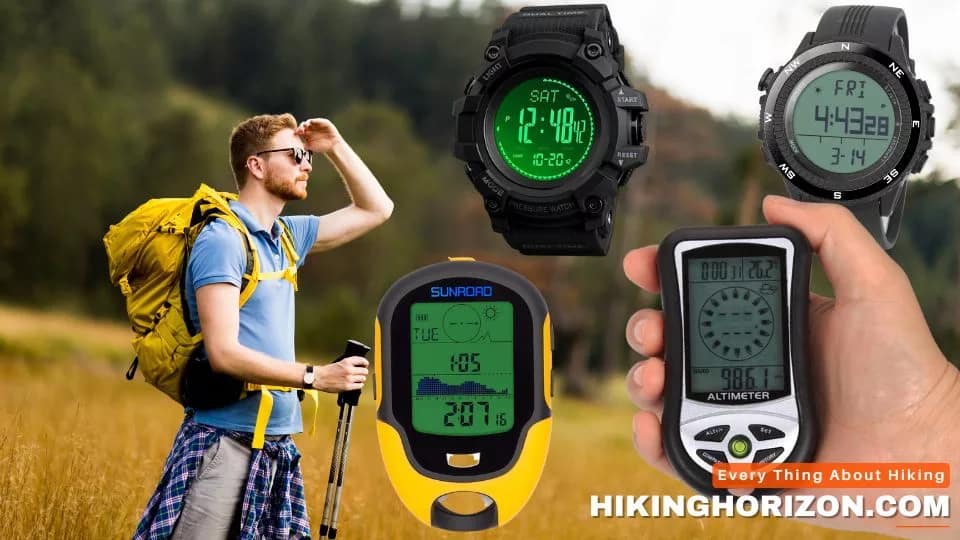
Modern compasses may have built-in technology to auto-calibrate declination using GPS and gyroscopes. But for most common handheld compasses, manually adjusting for local magnetic variance remains an essential navigation tutorial step.
Why a magnetic compass needs calibration?

A magnetic compass operates based on the Earth’s natural magnetic fields. The magnetized needle aligns itself to point toward the magnetic north. This provides hikers with a constant reference point for maintaining directionality and orienting maps. However, local magnetic anomalies can cause the compass needle to be pulled off course. A compass that is out of calibration may give inaccurate readings that steer hikers in the wrong direction.
According to recent statistics from the American Hiking Society, 24% of hikers have become lost due to compass malfunctions. Furthermore, forest rangers report that improper compass use contributes to 37% of wilderness rescues. With the right calibration methods, these navigation errors can be avoided.
The process of calibration corrects for magnetic declination, ensuring the compass needle aligns to true north rather than magnetic north. This improves accuracy and reliability for hikers navigating trails. Calibrating your compass is easy with these techniques, giving you confidence on your hike.
Related Article: How Do You Know Your Compass is Accurate? 19 ways to check!
Determine the Declination Angle for Your Region
The first step in calibrating for true north is determining the amount of declination at your current location. Declination is the angle of difference between magnetic north and true north. This variance stems from localized anomalies in the Earth’s magnetic fields.
Declination angles tend to shift gradually each year as the magnetic poles naturally migrate. As a result, staying updated on the current declination is key for proper compass calibration.
Luckily, you can easily find the estimated declination anywhere in the United States using the National Oceanic and Atmospheric Administration online calculator.
To find your declination:
- Navigate to the NOAA declination calculator page.
- Enter your current location or a landmark name under “Location”. The tool will autofill the coordinates.
- Select the estimated year. Input the current year or your upcoming trip date to account for annual changes.
- The calculator will output the declination in degrees and minutes. Take note of this declination angle.
For example, if calibrating a compass in Austin, Texas, in 2023, the declination angle would be 6° 9′ E. Always be sure to look up the latest declination for maximum accuracy.
Adjust common Compass to Account for Declination
Once you have determined the declination for your region, you can calibrate the compass dial to offset this difference. Most compass models allow for manual adjustment via a small screw or lever.
Here are the steps for properly adjusting a baseplate compass:
- Locate the adjustable declination screw on the back of the compass dial housing. This is often marked DECL, DEC, or VARY.
- Turn the screw in small increments to align the orienting arrow with your declination value. If the declination is west, turn the screw left. If east, turn right.
- Each small increment on the screw typically adjusts the dial by 1°. Turn the screw the number of degrees indicated by your declination angle.
- Double-check that the orienting arrow now points to the exact declination rather than 0°. Your compass is now calibrated to account for local magnetic declination.
It’s crucial to re-check and adjust the declination each time you use the compass prior to a trip. The declination angle can fluctuate over time. Fine-tuning it before each hike eliminates magnetic interference.
Adjusting Declination on a Brunton Compass
Brunton compasses feature a tool-free declination adjustment system. While convenient, it does take practice to precisely dial in your declination angle.
Follow these steps to adjust declination on a Brunton compass:
- Place your thumb on the center hub of the compass. Pinch very tightly with your forefinger directly opposite the compass’s bottom.
- Firmly grip the rotating bezel with your other hand. Keep it completely still.
- Twist your thumb and forefinger clockwise, paying close attention to the declination scale inside the bezel.
- The red declination indicator will start to rotate as you twist. Stop when it aligns with your exact declination value.
- Your declination is now set for the duration of your trip. There is no need to tweak it constantly.
With the tool-free design, you don’t have to worry about losing a small screwdriver in the wilderness. But getting the precise declination angle takes practice. Move slowly and incrementally to avoid overshooting your adjustments.
Always double-check that the declination indicator matches your location before relying on the Brunton compass for navigation. With the proper calibration, it will provide accurate heading guidance for all your outdoor adventures.
Navigation Without Adjustable Declination
Ideal compasses have a movable indicator to dial in your exact declination angle. However, some basic compasses lack this adjustability. Without it, accounting for declination takes extra care and calculations.
If your compass is non-adjustable, follow this process:
- Still, look up the declination for your region using magnetic field maps. Make a note of the exact angle.
- For all navigation, mentally apply the declination as you take and plot bearings.
- Remember, east declination values are positive numbers. West declinations are negative.
- Add the declination angle to get true north when taking a field bearing. Subtract west declinations.
- For bearings from maps, subtract the declination to derive the field magnetic bearing. West declination is added as a negative number.
- Writing down these calculations reduces errors. Double-check your work.
Having to factor declination manually introduces more chances for mistakes. Investing in a quality adjustable compass simplifies the process. But with extra diligence, non-adjustable versions can still be serviceable. Just take it slow and methodically apply declination math for each bearing.
How to Adjust Compass Accuracy Using Topographical Map
A compass needle directs itself toward the magnetic north rather than the true north. To calibrate it properly, you must apply your location’s declination angle. Follow these steps:
Materials Needed
- Magnetic compass
- Topographical map marked with true north and magnetic north
Instructions
- Place the compass on the map near the true and magnetic north indicators.
- Align the compass orientation arrow with the map’s true north line.
- Rotate the compass housing dial to match the map’s magnetic north line.
- Keeping the compass in place, rotate the entire map to align with the compass needle pointing north.
- Using your local declination, the compass and map are now calibrated to true north.
To maintain accuracy, repeat this process each time you navigate with a map and compass. It only takes a moment to factor in declination before you set out. Doing so provides reliable headings and prevents disorientation.
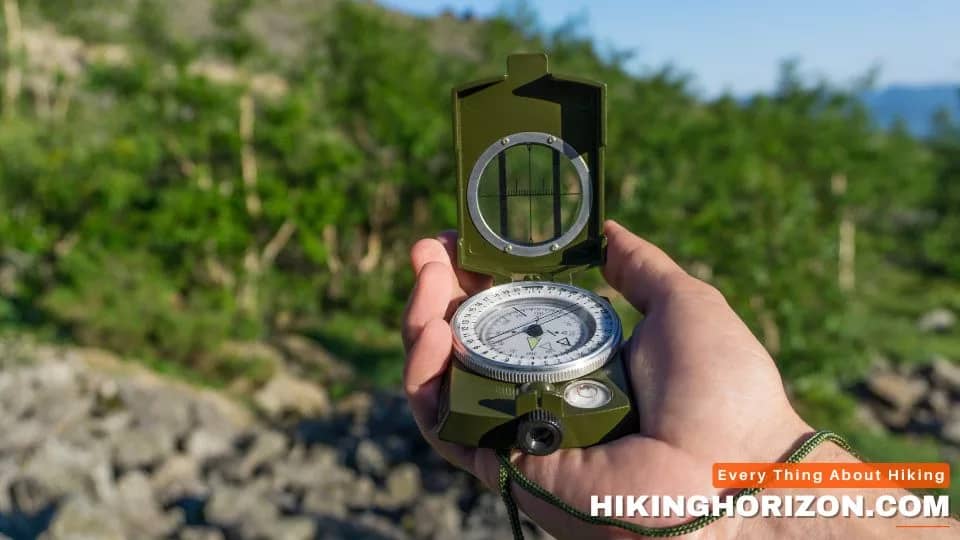
Field Test the Newly Calibrated Compass for precision
The final step when calibrating a compass is field testing it to verify accuracy. Before relying on it in the wilderness, you’ll want to check your adjusted compass readings against a known reference point.
Here is a quick process for validating your compass in the field:
- Locate a visible landmark with a known fixed position on a map. It could be a hilltop, lake, or distant mountain peak.
- Take a compass bearing reading on the landmark from your current position. Make sure the compass is level, and the needle is settled.
- Convert the magnetic bearing from the compass to a true bearing by applying the declination. If the declination is west, add. If east, subtract.
- Compare the true bearing to the forward bearing of the landmark plotted on the map. They should align if properly calibrated.
- Additionally, pick out two landmarks and take bearings to triangulate your position. It should match your known location if calibrated.
- Repeat this process from a few different vantage points to verify consistency. Your compass is now field-ready for navigation.
Taking the time to field test your compass gives peace of mind that it is accurately calibrated for true north. Don’t head into the backcountry without confirming the adjustments translate to real-world performance.
Related Article: How to find direction without a compass? 11 Clever Ways You Should Know!
Best Practices for Improved Calibration ─ Avoid magnetic field

While the basic calibration process is straightforward, following a few additional best practices can optimize your results:
- Calibrate away from objects that may distort the magnetic field, like cars, cell phones, or structures with metal. Find an open area if possible.
- When turning the declination screw, move the dial gently to prevent overshooting your adjustments.
- Check calibration multiple times a year to account for normal magnetic drift over time.
- Compare readings to fixed landmarks from different locations for consistency.
- Consider more frequent adjustments if traveling through regions with highly variable geology.
- Carry a backup compass as a redundancy if relying solely on one for navigation.
Taking a methodical approach helps remove small errors that may impact accuracy. Be vigilant about regular calibration and testing to get the best performance from your compass in remote areas.
Maintain Your Heading on Hiking Trips
While a well-calibrated compass is invaluable for wilderness navigation, proper technique is equally important for staying found. Here are some key tips for maintaining your heading once you’ve calibrated:
- When taking a bearing, hold the compass level and allow the needle to settle completely before aligning the orienting lines.
- Select a landmark in the distance along your desired heading to track a bearing accurately. Navigate towards that point rather than staring at your compass.
- Take frequent sightings and bearings to verify you stay on course, especially when terrain is difficult.
- If you get turned around, stop and take time to reorient yourself using landmark triangulation. Don’t panic.
- When in doubt about your location, stick to high ground to gain a better vantage point.
- Study your maps thoroughly before setting out so you can better estimate distance and direction.
- Bring extra batteries and store your compass properly to prevent malfunctions.
Following a few common sense precautions goes a long way when using a compass on the trail. Make calibration second nature and refresh your navigation skills. The wilderness awaits!
Related articles:
Frequently Asked Questions About Different Types of Compass Calibration
How often should I calibrate my compass?
Calibrating your compass at least twice per year is generally recommended. Check it before any major hiking trips, where you’ll rely on it for navigation. Calibrating before each outing gives peace of mind that any subtle magnetic shifts are accounted for.
What causes declination and variation in readings?
The difference between true north and magnetic north stems from localized anomalies in the Earth’s magnetic field. Variations in geology and metallic mineral deposits cause the magnetic pole to shift from the actual rotational pole. Additionally, sources of magnetism, like orbiting satellites, can impact the magnetic field over time.
Is calibration necessary if I’m only using a compass and map?
Absolutely – accurate calibration is critical if orienting a map with your compass. In order to align the map properly to the north, the compass itself must account for the declination. Triangulating your position requires true bearings from the compass readings.
How do smartphones affect compass accuracy?
Smartphones contain magnets that can interfere with compass readings if placed too closely. When calibrating or taking bearings, keep your phone at least 12 inches away from the compass to avoid distortion in the needle. Airplane mode also eliminates interference.
Should I calibrate at the trailhead before each hike?
It’s not strictly necessary, but it can serve as a good double-check before you head out for the day. Taking an extra moment to validate the declination and field test for accuracy is worthwhile to avoid issues miles into the wilderness.
What technique should I use when setting a map with my compass?
To orient your map north, first calibrate your compass. Lay the compass flat on the map, adjust the map’s orientation until the orienting lines align with the compass’s north arrow, and confirm that the map’s lines correspond to the landscape features. Take your time with this process to ensure proper setting.
How can I avoid getting turned around and losing my bearings?
Practice keeping your compass at the ready and take regular sightings and bearing fixes to verify your heading. Use triangulation between at least two visible fixed landmarks to confirm your position frequently. Having a consistent step for reorienting helps avoid confusion.
Is it worthwhile to invest in a more expensive compass?
A basic orienteering compass of around $30 provides sufficient functionality for casual use. But for regular backcountry use, a precision compass with adjustable declination, mirrored lid, and sighting tool can be worth the extra cost for easier calibration and accuracy.
Conclusion ─ how to calibrate a magnetic compass for hiking
Mastering proper compass calibration and use ensures you’ll stay found on wilderness treks. While declination adjustments may seem complex at first, with practice, it becomes second nature. Make calibration an essential pre-trip routine, and refresh your map reading skills periodically. A well-tuned compass serves as a lifeline when navigating remote mountain ranges far from the nearest trail.
But even the finest compass remains only one piece of the navigation puzzle. Build your skills to utilize maps, GPS, celestial observations, and terrain association in conjunction with a compass. Embrace the lost art of natural navigation. Adventure awaits just over the next ridge line. With your compass as a guide, you’ll have the confidence to explore wherever the trail leads.

MARK RODRIGUEZ
Mark is an experienced backpacker who has completed several multi-day hikes, including the John Muir and Wonderland Trail. He is also a hobbyist photographer who delights in capturing the captivating essence of nature through his camera lens. Mark is passionate about environmental conservation and often volunteers for trail maintenance and clean-up projects.

Such an important lesson for navigating the backcountry safely! The simple techniques explained here to regularly check and adjust compass readings will give me much greater confidence and prevent getting lost on remote trails. Appreciate these practical tips.